Author: admin

  • Pool Losing Water in Texas? How to Tell If It’s Evaporation or a Leak

    Pool Losing Water in Texas? How to Tell If It’s Evaporation or a Leak

    If your pool is losing water during a Texas summer, it’s natural to wonder whether it’s simply evaporation or a leak. In Texas, the most common causes of pool water loss are evaporation, everyday pool use, and leaks. While evaporation is expected during the summer, excessive or unexplained water loss may indicate a problem that needs attention.

    This article walks you through what’s normal, what’s not, and how to figure out which situation you’re actually in. Identifying the cause early helps protect both your pool and your water bill.

    Understanding Pool Water Loss

    Pool water loss occurs when water leaves your pool through evaporation, normal use, or leaks. Your pool can even lose water for more than one reason, but not all of them are problems. Some are just part of owning a pool in Texas heat, while others truly need fixing.

    Why Is My Pool Losing Water?

    If your pool is losing water, the cause usually falls into one of two categories: normal water loss from everyday conditions or water loss caused by a leak or equipment problem.

    Natural causes include:

    • Evaporation — During the hottest parts of the Texas summer, especially when temperatures stay above 95°F, pools naturally lose water through evaporation. Wind, low humidity, direct sunlight, and warm water temperatures can all increase evaporation, making water loss more noticeable.
    • Splash-out — Active swimming naturally sends water over the pool’s edge. Kids, dogs, and energetic pool games can all contribute to water loss.
    • Backwashing — If you have a sand or DE filter, backwashing removes debris from the filter but also sends some pool water to waste. (Cartridge filters do not require backwashing.)

    Abnormal causes are a different case:

    • Leaks — Cracked plumbing, damaged fittings, failing equipment, or structural cracks can all cause your pool to lose water faster than normal evaporation.
    • Structural issues — Soil movement, deteriorated vinyl liners, cracked skimmers, or damaged pool shells can create leaks that lead to steady, unexplained water loss.

    What Pool Water Loss Means and How to Spot It

    A dropping water level simply means your pool is losing water faster than it’s being replaced. The next step is determining whether that rate of water loss falls within the normal range.

    To observe and track it:

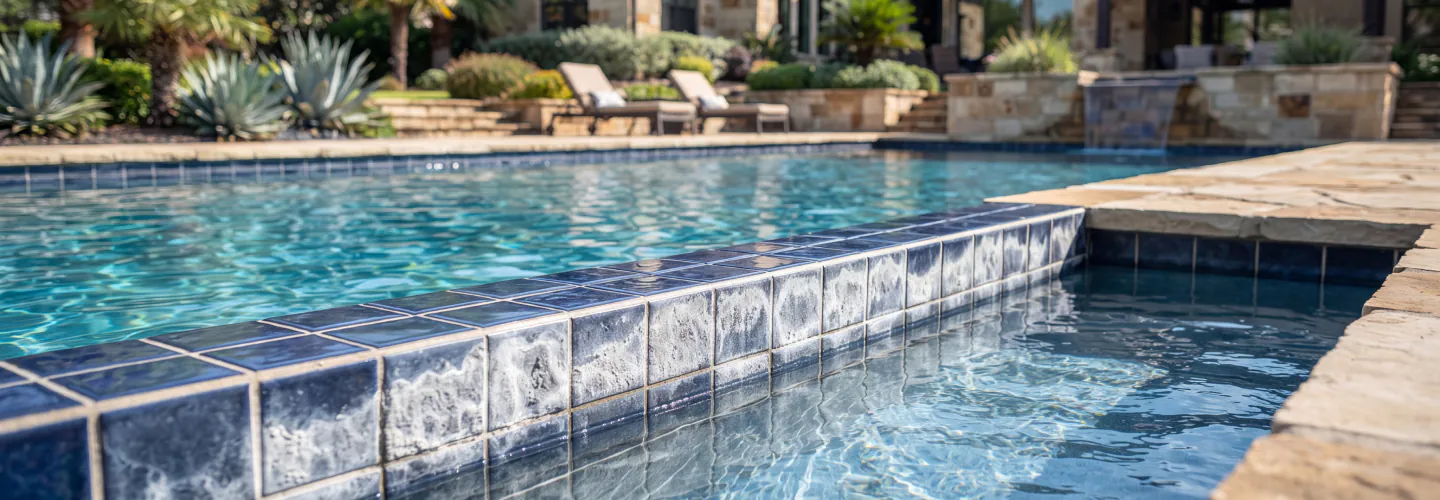
    • Mark the waterline on your pool tile or skimmer with a piece of tape
    • Check it at the same time every day — morning works well before the sun affects the reading
    • Use a ruler or tape measure to record how many inches have dropped over 24 hours

    During a typical Texas summer, many pools lose about 1/8 to 1/4 inch of water per day through evaporation. During periods of extreme heat, low humidity, and windy conditions, evaporation can occasionally approach 1/2 inch per day. If your pool consistently loses more water than expected for the weather conditions, or the loss continues despite cooler or calmer weather, it’s worth investigating for a possible leak.

    How Much Pool Water Loss is Normal in Texas Summers?

    Most Texas pools lose about 1 to 2 inches of water per week during a typical summer, although periods of extreme heat, dry air, and persistent wind can temporarily push evaporation closer to 3 inches per week.

    Evaporation Rates in July: The Texas Perspective

    July in Texas brings three conditions that speed up evaporation: high heat, low humidity in many regions, and wind. Together, these conditions significantly increase evaporation rates.

    • Temperatures across much of Texas regularly exceed 95°F during July.
    • During drier periods, lower humidity allows moisture to evaporate from the pool surface more quickly.
    • Even light winds continually move moist air away from the water’s surface, increasing evaporation.

    Here’s what that actually looks like in practice:

    • Daily loss from evaporation: somewhere between 1/8 and 1/4 inch, which adds up to roughly 1 to 2 inches per week.
    • Under typical July conditions, this equals roughly 1 to 2 inches of water loss per week.

    For a standard 16×32-foot pool, every inch of water equals approximately 320 gallons. Losing 2 inches per week means replacing roughly 640 gallons of water from evaporation alone.

    When Does Water Loss Become a Concern?

    Water loss becomes a concern when it exceeds what normal weather conditions and regular pool use can reasonably explain. In most cases, consistently losing more than 2 inches per week deserves further investigation.

    Signs your pool that’s losing water may point to something beyond evaporation:

    • The water level drops more than 1/4 inch per day consistently under typical summer conditions.
    • Wet or soggy ground around the pool area that isn’t from splash-out or irrigation.
    • You’re refilling the pool far more often than usual
    • Persistent air bubbles are coming from the return jets, especially alongside noticeable water loss.
    • The pump loses prime or begins drawing air because the water level has dropped below the skimmer.

    If any of these warning signs show up, don’t wait, since leaks often become more expensive to repair over time.

    Is It Evaporation or a Leak? How to Tell the Difference

    One of the more practical ways to check whether your pool water loss is due to evaporation or a leak is the bucket test. No special equipment is required, and you’ll usually have an answer within 24 hours.

    The Bucket Test Explained

    The bucket test compares how much water evaporates from your pool with how much evaporates from a bucket sitting under the same conditions.

    Here’s how to run it:

    • Fill a straight-sided bucket about three-quarters full with pool water.
    • Place the bucket on a pool step so it’s partially submerged and stable, with the water inside at roughly the same level as the pool water outside.
    • Mark the water level inside the bucket with tape or a marker. Then mark the pool’s water level on the outside of the bucket.
    • Turn off any automatic water-fill system so it doesn’t replace lost water during the test.
    • Leave the pool operating under its normal conditions for 24 hours. Avoid swimming or adding water during the test.
    • Compare the two water levels after 24 hours.

    Avoid performing the test during rain or unusually windy conditions, as both can affect the results.

    Reading the results:

    • If the pool water drops noticeably more than the bucket water, the pool is likely losing water from something other than normal evaporation.
    • If both water levels drop by about the same amount, evaporation is the most likely explanation.

    The bucket test won’t pinpoint the exact location of a leak, but it can tell you whether further investigation is needed.

    Other DIY Leak Detection Methods

    If the bucket test result suggests that there’s a leak, a few more checks can help you get closer to the source before calling anyone.

    Visual inspection:

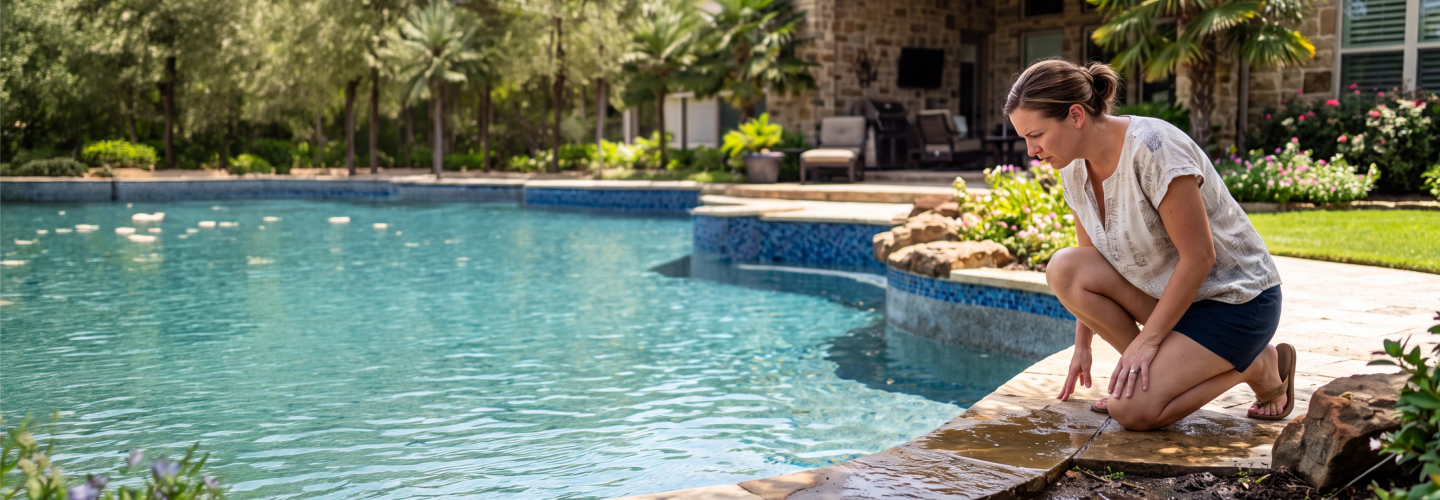
    • Look for cracks around the pool shell, tile line, skimmer, returns, or light fixtures.
    • Check expansion joints and caulking for separation or deterioration.
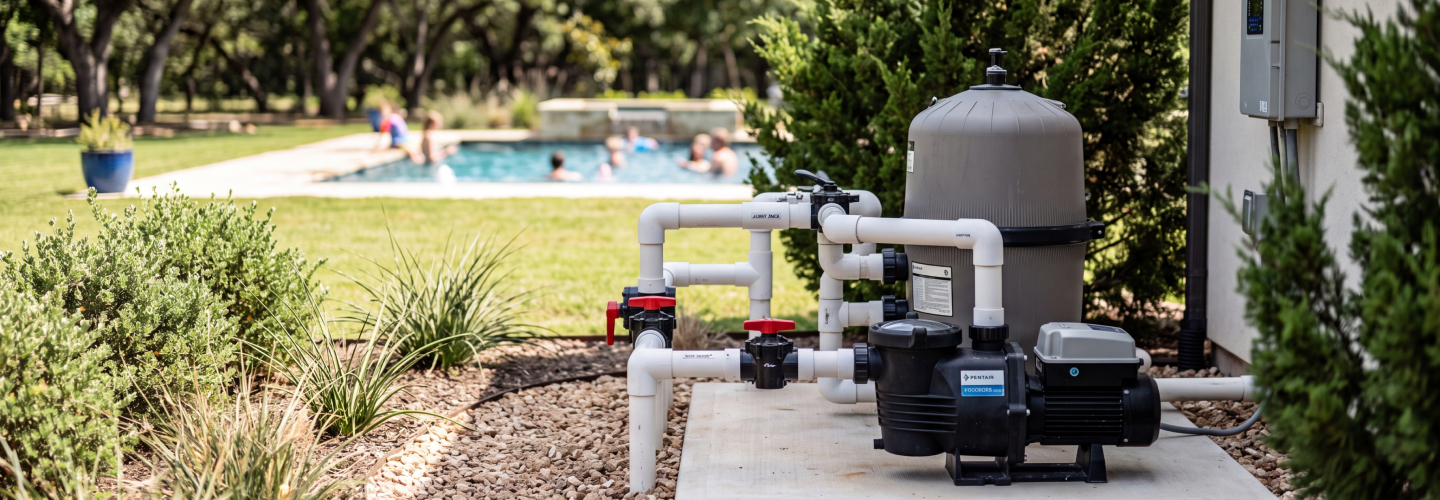
    • Inspect the equipment pad for wet spots, dripping equipment, or plumbing leaks.
    • Watch for unusually soggy ground around the pool or equipment.

    Pool dye test:

    • Turn off the pump and allow the water to become completely still.
    • Using leak detection dye or a few drops of dark food coloring, slowly release the dye directly next to a suspected crack, fitting, skimmer, or light niche.
    • If the dye is drawn into one specific spot, it may indicate a leak.

    What to Do If You Suspect a Leak

    If your tests point to a leak and you can’t locate the source on your own, the next step is professional pool leak detection. Leaks rarely resolve on their own, and waiting usually allows water loss and potential damage to worsen.

    When to Call a Pool Leak Repair Company

    Reach out to a pool leak repair company when:

    • Your pool consistently loses more water than expected for the current weather, especially more than about 2 inches per week during typical summer conditions.
    • Wet ground, unusually soft soil, or areas of deck settling around the pool or equipment.
    • There are visible cracks or shifts in the pool structure, deck, or tile line
    • DIY tests confirm a leak, but you can’t find where it’s coming from
    • Your pump frequently loses prime or shows signs of drawing in air

    What a professional pool leak detection service typically involves:

    • Pressure testing of the pool’s plumbing lines to determine whether the leak is in the plumbing system.
    • Electronic listening devices and underwater microphones to locate leaks without excavation
    • A clear diagnosis with repair options before any work begins
    • Many companies provide written findings and repair recommendations.

    Professional pool leak detection companies often use a combination of these methods to accurately locate leaks before recommending repairs.

    Choosing the Right Pool Leak Detection Service

    Pool leak detection services aren’t all the same. Some companies specialize in pool leak detection, while others are general plumbers who also offer the service. That difference matters when the problem is underground or inside your pool shell.

    What to look for in a provider:

    • Licensed and insured: If something goes wrong on your property, you want that covered
    • Experience specifically with swimming pool leak detection and repair, not just general plumbing.
    • Pricing that’s clear before anything starts
    • Reviews from actual pool owners in your area, not just general contractor ratings

    Before you hire, ask:

    • What tools and methods do you use for pool leak detection?
    • Do I get a written report after the inspection?
    • If repairs are needed, does your team handle them, or will I need to hire another contractor?
    • What does your guarantee cover, and for how long?

    Preventing Excessive Water Loss: Best Practices for Pool Care

    Reducing evaporation, spotting leaks early, and regular maintenance are the best ways to prevent excessive water loss.

    Tips for Minimizing Evaporation

    • A pool cover does more than keep debris out. It’s the most effective way to hold water in when the pool isn’t being used
    • Providing shade with structures like shade sails, pergolas, or strategically placed landscaping can reduce direct sunlight on the water, which helps slow evaporation. Windbreaks such as fencing or hedges can also help reduce evaporation caused by wind.
    • Refill in the early morning or after sundown. If you need to add water, early morning or evening is ideal because evaporation rates are typically lower than during the hottest part of the day.
    • Keep the water level around the middle of the skimmer opening. If it’s too high, splash-out becomes a bigger factor

    Regular Maintenance to Prevent Leaks

    • Inspect the pool perimeter once a week for wet spots, new cracks, or anything that looks off
    • Poor water chemistry—especially persistently low pH or low alkalinity—can accelerate corrosion of metal components and deterioration of seals, fittings, and some pool surfaces over time.
    • Keep a simple log of your water levels to help spot unusual changes over time
    • An occasional professional inspection can help identify small issues before they become costly repairs, especially on older pools.

    Frequently Asked Questions (FAQs)

    1) How can I tell if my pool is leaking or just evaporating?

    Run the bucket test — it’s the most straightforward way to know. If the pool’s water level drops more than the water level inside the bucket, the pool is likely losing water from something other than normal evaporation, making a leak the most likely explanation.

    2) What is the average amount of pool water loss per week in Texas?

    During a typical Texas summer, most pools lose about 1 to 2 inches of water per week through evaporation. During periods of extreme heat, low humidity, or persistent wind, evaporation can occasionally be higher.

    3) Are there simple tests I can do before calling a pro?

    Yes. The bucket test is the most reliable DIY method. A visual check around the tile line, equipment pad, and exposed plumbing is also helpful. Pool dye placed directly next to a crack or fitting will drift toward the opening if water is escaping through it.

    4) How quickly should I act if I suspect a leak?

    If you suspect a leak, it’s best to investigate it as soon as practical. Even  a slow leak that goes ignored for weeks can waste a serious amount of water and may eventually contribute to soil erosion or structural damage around the pool.

    5) Can normal pool maintenance reduce the risk of leaks?

    Yes. Regular maintenance can help prevent leaks by catching worn fittings, small cracks, and equipment issues before they become larger problems. Keeping your water chemistry balanced also protects pool surfaces and plumbing components over time.

    Take Control of Your Pool’s Water Loss

    A pool losing water during a Texas summer isn’t unusual. In most cases, evaporation accounts for about 1 to 2 inches of water loss per week, especially during periods of intense heat. However, if your pool is losing water faster than expected, it’s time to investigate further. This is especially true if the loss is accompanied by wet ground, air bubbles, or equipment issues.

    The bucket test is a reasonable first step, and regular tracking helps you notice changes early. If something doesn’t add up, calling a pool leak repair company before the problem gets worse is often the smarter financial decision.

    If your pool continues losing water after you’ve ruled out normal evaporation, or your DIY tests suggest a leak, professional leak detection can identify the source before the problem becomes more expensive to repair. Poolie’s experienced technicians use specialized equipment to locate leaks accurately, so you can make informed decisions about the next steps. Schedule an inspection using the form below to get started.
  • Pool Turned Green After the Rain? Causes, Fixes, and Prevention Tips for Texas Pools

    Pool Turned Green After the Rain? Causes, Fixes, and Prevention Tips for Texas Pools

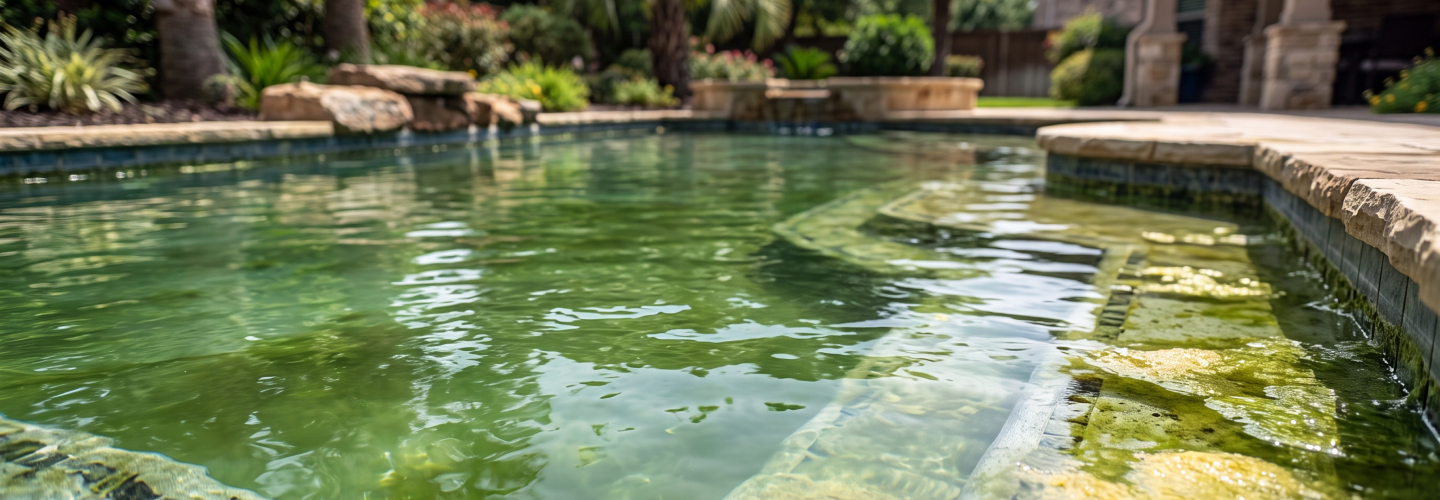
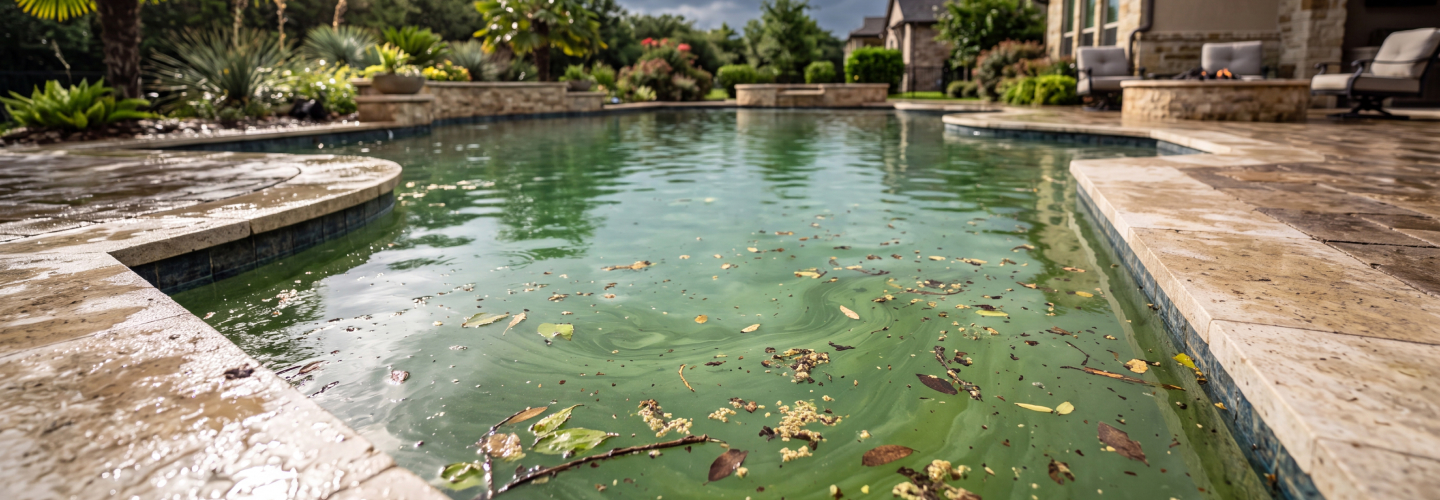
    If your pool turns green after a rainstorm, algae is usually the culprit. Rainwater can dilute chlorine, disrupt your pool’s chemical balance, and wash dirt, pollen, phosphates, and other organic debris into the pool, creating conditions that allow algae to grow if sanitizer levels become too low.. Add Texas heat and sunshine, and what starts as slightly cloudy water can quickly become a green, murky pool.

    The good news is that a green pool after rain is fixable. With the right treatment and ongoing maintenance, you can restore clear water and help prevent the problem from happening again. This guide explains why it happens, how to fix it, and what Texas pool owners can do to help prevent algae from returning.

    Understanding Why Pools Turn Green After Rain

    Pools turn green after the rain because storms can disrupt your pool’s water chemistry and reduce the effectiveness of your sanitizer. Rain can dilute free chlorine, introduce organic contaminants, and create ideal conditions for algae to multiply if sanitizer levels become too low. Sometimes, a pool can begin turning green within 24 hours of a storm, especially during hot Texas weather.

    The Science Behind Green Pools

    Rain is more than just water. It can carry dirt, pollen, dust, organic debris, and nutrients such as phosphates and nitrates into your pool through rainfall and runoff. These contaminants increase your pool’s chlorine demand and can support algae growth if sanitizer levels are not maintained. At the same time, the rainwater dilutes your chlorine and shifts your pH, weakening your pool’s main defense against biological growth.

    When free chlorine drops below the level needed to sanitize the water, algae can multiply rapidly. In Texas, where warm temperatures and intense sunlight accelerate biological growth, a pool that looks slightly cloudy after a storm can turn noticeably green in a matter of hours.

    Common Causes Specific to Texas

    Texas weather creates the perfect environment for algae, especially after heavy rain. Several local conditions make pools more vulnerable:

    • Warm water temperatures create a better environment for algae to grow year-round
    • Heavy, sudden storms can add large amounts of rainwater and debris, quickly increasing chlorine demand and disrupting water balance.
    • High pollen and dust counts, especially during spring, add extra organic material that increases sanitizer demand and can contribute to algae growth if chlorine levels are not maintained.
    • Intense post-storm sunlight accelerates chlorine loss, allowing algae to spread more quickly when sanitizer levels are already low.

    These conditions don’t just make green pools after rain a common issue for Texas homeowners. They also allow algae to develop much more quickly than in cooler or drier climates if the pool is not properly maintained.

    Immediate Steps to Take When Your Pool Turns Green

    If your pool turned green after the rain, act as soon as possible. Algae can spread rapidly, especially during warm Texas weather, and delaying treatment only gives it more time to grow. Addressing the problem within the first 24 to 48 hours can make cleanup faster, easier, and less expensive.

    Assessing the Situation

    If your free chlorine reads zero, don’t skip testing before shocking. Knowing your starting chemistry helps you determine how much sanitizer you’ll need and whether other balance issues should be corrected first.

    Before adding chemicals, take a few minutes to determine the extent of the problem.

    Start by inspecting the water. A light green tint usually indicates an early-stage algae bloom that’s easier to eliminate. If the water is dark green or visibility is limited to a foot or two, the algae have likely spread throughout the pool and will require a more aggressive treatment.

    Next, test your water chemistry. Rain can dilute chlorine and alter your pool’s pH and total alkalinity, reducing the effectiveness of treatment products. Check your free chlorine, pH, and total alkalinity before adding chemicals, as balancing your water first helps chlorine work more efficiently against algae.

    Pool Care After Rain: First Response

    Once you finally know where things stand, work through these steps in order:

    1. Skim the surface to remove leaves, debris, and anything the storm carried in. Organic debris increases chlorine demand, making it easier for algae to continue growing if sanitizer levels become too low.
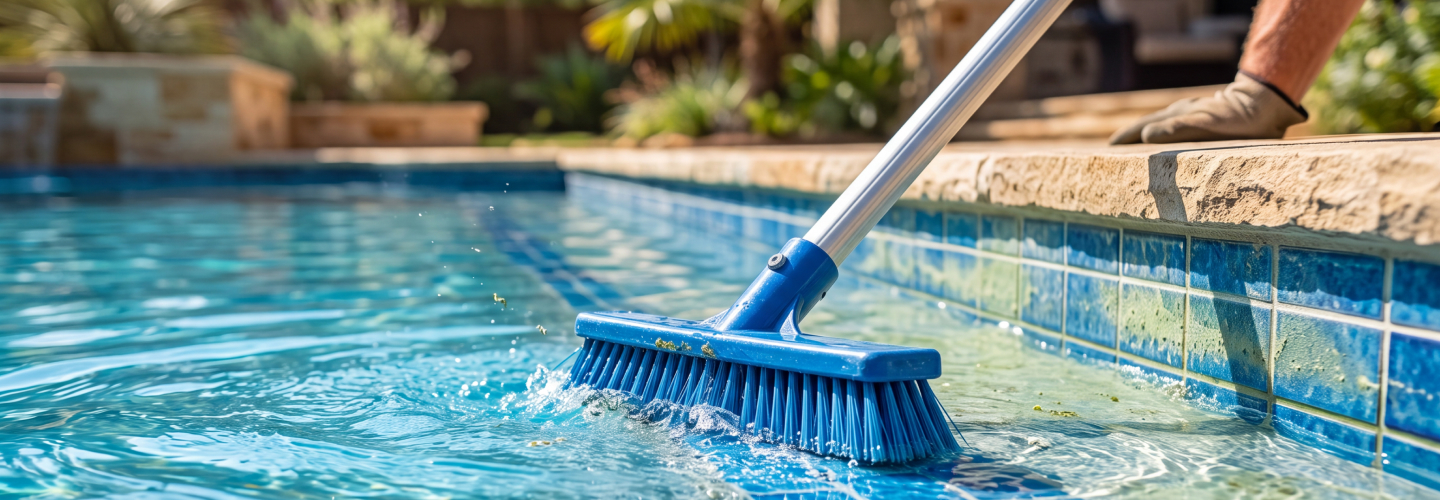
    2. Brush the walls, steps, and floor to loosen algae from pool surfaces. This makes it easier for chlorine to reach and kill it.
    3. Run your pump and filter continuously throughout the initial treatment process (at least 24 hours, or longer if the pool remains cloudy or green). Proper circulation helps distribute chemicals and allows the filter to remove dead algae and debris.
    4. Empty your skimmer and pump baskets so water can move freely through the system.

    Good pool care after rain starts with these basics. While it may be tempting to jump straight to shocking the pool, removing debris, improving circulation, and checking your water chemistry first will make your treatment more effective and help restore clear water sooner.

    Green Pool Treatment Methods

    Effective green pool treatment involves two essential steps: eliminating the algae and removing it from the water. Chemicals kill the algae, but brushing, vacuuming, and filtration are what clear it from your pool. Skipping either step can allow algae to return, even if the water initially looks clean.

    Chemical Shock Treatments

    Shocking your pool is one of the most effective ways to treat a green pool after rain. Pool shock raises the chlorine level high enough to kill algae, bacteria, and other contaminants that regular sanitizer levels can’t handle.

    For most pools, calcium hypochlorite shock is an effective and widely available option. It works quickly and is well suited for treating algae blooms. If you have a vinyl liner pool, however, a non-chlorine shock may be the safer choice, as high concentrations of chlorine can fade or damage the liner over time.

    To get the best results:

    • Use the correct dosage. Always follow the manufacturer’s dosing instructions based on your pool volume and the severity of the algae bloom.
    • Shock the pool after sunset. Sunlight breaks chlorine down fast, so treating the pool in the evening allows the sanitizer to work longer and more effectively.
    • Keep the pump running. Run your circulation system continuously for at least 24 hours to distribute the treatment throughout the pool.
    • Retest the water the next day. Check chlorine and pH levels after 12 to 24 hours. If chlorine levels have dropped again, a second shock treatment may be necessary because algae are still consuming the sanitizer.

    Manual Cleaning Techniques

    While chemicals kill algae, they don’t remove it from the pool. That’s why manual cleaning is a critical part of any green pool treatment.

    After shocking, dead algae settles on the pool floor and walls. Brush every surface thoroughly: corners, steps, behind ladders, along the waterline. If your filtration system allows it, vacuuming to waste can help remove heavy algae without sending it back through the filter. Otherwise, vacuum normally and clean or backwash the filter as needed.

    Your filtration system will also need extra attention during cleanup.

    • Sand and DE filters: Backwash the filter when the pressure gauge reads 8 to 10 psi above the clean starting pressure
    • Cartridge filters: Remove the cartridge and rinse thoroughly with a hose. If the cartridge is heavily coated with algae or oils, a deep cleaning with an appropriate filter cleaner may also be necessary.

    Keeping the filter clean improves circulation and helps clear cloudy water more quickly.

    When to Call a Green Pool Cleaning Service

    Some algae blooms are too severe for standard DIY treatment. If your pool turned green after the rain and repeated shocking, brushing, and filtering aren’t producing results, it may be time to bring in a professional.

    A green pool cleaning service can address more than visible algae. Professional technicians can use specialized equipment and commercial-grade products, while also diagnosing underlying water chemistry or equipment issues, such as clogged filters or poor water flow, that can prevent effective treatment or cause algae to return.

    Consider calling a professional if:

    • Your pool is still visibly green after 3 or more days of treatment
    • Algae return within a few days after the water clears
    • You notice black or dark gray on the pool walls or floor
    • Your pump, filter, or other pool equipment isn’t working properly after the storm

    Do not swim in a green pool or while chlorine levels are above the product manufacturer’s recommended swimming range. Wait until the water is clear and chemistry has returned to safe levels before entering the pool.

    Preventing Your Pool from Turning Green After Rain

    The best way to prevent a pool from turning green after rain is through consistent maintenance. Keeping your water chemistry balanced and your pool clean before a storm makes it much harder for algae to take hold when rain dilutes sanitizer levels and washes in debris.

    Routine Pool Maintenance Tips

    Test your pool water every week, paying close attention to free chlorine, pH, and total alkalinity. Calcium hardness and cyanuric acid can typically be checked monthly. Maintaining these levels within the recommended range helps your pool recover more quickly after heavy rain and reduces the risk of algae growth.

    Regular brushing and vacuuming are just as important. Algae may already be present in small amounts even when the water looks clear.. Routine cleaning removes buildup before it becomes a problem, while cleaning or backwashing your filter ensures it can handle the extra debris that storms bring.

    Best Practices for Pool Care After Rain

    Preparing your pool before a storm and responding quickly afterward can help prevent algae blooms.

    Before the storm:

    • Raise free chlorine to the upper end of its recommended range before the storm, especially if heavy rainfall is expected.
    • Check and adjust pH and alkalinity
    • Cover the pool if you have a cover. It helps keep leaves and debris out, although heavy rain will still affect the pool’s water chemistry.
    • Remove loose items from the pool deck that could blow in

    After the storm:

    • Skim and brush as soon as it’s safe to do so
    • Retest the water as soon as practical after the storm and adjust the chemistry as needed.
    • Run the pump for at least 24 hours straight
    • Check the equipment for any visible damage

    What you do in the hours before and after a storm has a direct impact on how quickly your pool recovers. Pools that enter a storm with balanced water chemistry and receive prompt post-storm maintenance are far less likely to develop algae blooms.

    Frequently Asked Questions

    1) What is the fastest way to clear a green pool after rain?

    The fastest way to clear a green pool after the rain is to remove debris, brush all pool surfaces, and test the water chemistry. Balance the pH and alkalinity if needed, then shock the pool after sunset and run the pump continuously for at least 24 hours. With prompt treatment, lightly affected pools often begin to clear within one to two days, while more severe algae blooms may take several days and multiple treatments.

    2) How much does a green pool cleaning service typically cost?

    The cost of a green pool cleanup varies depending on the size of the pool, the severity of the algae bloom, and whether additional services such as filter cleaning or equipment repairs are needed.

    3) Are there eco-friendly options for green pool treatment?

    Yes, there are some eco-friendly options for green pool treatment. Enzyme-based products help break down oils and other organic contaminants, reducing chlorine demand and supporting overall water quality. However, they are not a replacement for chlorine when treating an active algae bloom. Copper- and silver-ion systems can help reduce algae growth, but they still require an EPA-approved sanitizer, such as chlorine, and copper can stain pool surfaces if levels become too high.

    4) Will insurance cover green pool cleanup after a storm?

    Standard homeowner’s insurance policies typically don’t cover algae treatment or routine cleanup, even after a storm. Physical storm damage to the pool structure or equipment is a separate matter and may fall under your policy, but that determination is between you and your insurance provider, so it’s best to contact your insurance provider directly to confirm your coverage..

    5) How can I tell if my pool equipment was damaged during the rainstorm?

    A few things to check after a heavy storm:

    • If the pump starts up normally
    • If the filter pressure is reading within its normal operating range.
    • If there are visible cracks, leaks, or signs of electrical trouble around the equipment pad
    • Whether the breaker has tripped or a GFCI outlet has been reset

    When the water stays murky despite the system running, that can also point to a filtration issue. If something seems off, shut the equipment down and get it looked at before running it further.

    6) What should I do if my pool keeps turning green after every rain?

    A pool that turns green after every rain usually has an underlying issue: either the baseline chemistry is consistently off, or the filtration system isn’t keeping up.

    Test more frequently between storms, not just after them. Make sure free chlorine levels remain within the recommended range between storms. If the issue continues, a professional assessment from Poolie can help identify what’s truly driving the problem.

    Regain Control of Your Pool’s Health

    A pool turning green after the rain is frustrating, but it’s also one of the more manageable pool problems to deal with when you spot it early and respond the right way. Test your water after every storm, keep your chlorine levels consistent, and brush and vacuum on a fixed schedule, not just when the water starts looking off.

    The pools that stay clear through Texas’s rainy seasons are the ones that get regular attention, not emergency treatment every time the weather changes. Build the habit of checking chemistry before and after rain, so most green pool situations become more predictable and manageable.

    When the green won’t clear up on its own, Poolie is there to help. Get in touch by filling out the form below, and let the team take it from there.

  • Weekly Pool Cleaning and Brushing: The Best Way to Prevent Summer Algae

    Weekly Pool Cleaning and Brushing: The Best Way to Prevent Summer Algae

    Weekly pool cleaning and brushing is one of the most effective ways to prevent algae during the summer. A consistent routine that includes skimming debris, scrubbing pool surfaces, vacuuming the floor, and maintaining proper water chemistry removes the conditions algae need to grow before they become a problem.

    Pool owners don’t think much about maintenance until they notice green water or slippery walls. By then, algae has already started spreading, making cleanup more difficult and expensive than routine prevention.

    The sections ahead will discuss what makes algae grow during summer, why brushing is an essential part of weekly pool maintenance, and how a simple weekly routine can help keep your pool clean and clear all season.

    What Happens When Algae Takes Over Your Pool

    Algae don’t simply float in the water. They attach to pool walls, steps, corners, and other surfaces where they multiply quickly if left undisturbed. Once established, they can spread throughout the pool, turning clear water cloudy or green and making surfaces slippery.

    Understanding what causes algae growth helps you prevent outbreaks before they start.

    Why Algae Thrive in Summer

    Warm weather creates ideal conditions for algae growth. As water temperatures rise, algae reproduce more rapidly, and during the Texas summer, pool water often stays warm enough for algae to multiply continuously.

    Heavy pool use also contributes to the problem. When more people are swimming, more organic material enters the water, such as their body oils, sunscreen, and dirt tracked in from outside. These contaminants increase the demand on your sanitizer, making it easier for algae to establish themselves if water chemistry isn’t properly maintained.

    Common Types of Pool Algae

    Green algae: This is one of the most common types of algae. It clouds the water and turns it green. It can float freely before attaching to surfaces, and it generally responds to treatment better than the other two types.

    Yellow (mustard) algae: This one tends to cling to shaded spots on walls and it’s easy to confuse with pollen or dirt. Moreover, it resists standard chlorine levels, which makes it a heavier task to clear out.

    Black algae: This can be considered as the most stubborn type of algae. It forms dark patches that root into the surface. It may be less common than the others, but once it’s established, it takes real effort to remove.

    Consequences of Algae Infestation

    An algae-infested pool is more than just an eyesore. As algae spreads, the water can become cloudy, surfaces turn slippery, and swimmers may be exposed to an increased risk of harmful microorganisms because algae can consume chlorine and indicate that sanitizer levels or circulation are inadequate, allowing bacteria and other pathogens to survive more easily.. Properly maintained pools with the correct chlorine or bromine levels and pH are less likely to spread germs that can cause swimming-related illnesses.

    Algae can also damage your pool over time. They may stain pool surfaces, create slippery steps and floors, and clog or overwork your filtration system as it removes algae and other organic matter. Left untreated, these conditions can reduce equipment efficiency and lead to more expensive maintenance or repairs.

    Consistent weekly pool maintenance helps prevent algae from gaining a foothold. Regular brushing, debris removal, and balanced water chemistry create an environment that’s less favorable for algae growth while helping keep the water cleaner and safer for everyone who uses the pool. The CDC also advises avoiding recreational water that appears discolored, scummy, or has an unusual odor because contaminated water can pose health risks.

    Why Does Weekly Pool Cleaning and Brushing Work

    Brushing gets to what chemicals can’t always reach; the layer of algae builds directly on pool surfaces to protect itself and stay attached. That’s the part that makes weekly pool cleaning and brushing more than just a surface-level task.

    How Does Algae Stick to Pool Surfaces

    Algae cells have microscopic structures that grip onto pool walls, steps, and floors. After attaching, they produce a thin biofilm, a protective layer of microorganisms and organic material that helps them adhere to surfaces and makes them more resistant to chlorine.

    That biofilm is part of why pools can look perfectly fine while algae is already working its way across the walls. It’s not visible early on. You almost won’t notice it until the colony is well established, and by then it’s already been growing for quite some time.

    Why Brushing is More Effective Than Vacuuming Alone

    A vacuum does its job on the floor, like loose debris, settled dirt, etc. What it can’t do is pull algae off a wall or get into the corner behind a ladder where biofilm has been built. Brushing breaks that contact directly. It scrapes cells off surfaces and pushes them into the water, where the filter and chemicals can actually deal with them.

    So vacuuming and brushing aren’t doing the same thing. One handles what’s already floating or sitting. The other handles what’s still holding on.

    The Role of Circulation and Filtration

    After brushing knocks algae loose, it doesn’t just disappear. It floats in the water, and something has to move it toward the filter. If circulation is weak, it can settle in a low-flow area and start attaching again somewhere else.

    Running the pump long enough each day, typically 8–12 hours during the summer depending on your pool size, pump type, bather load, and water temperature, helps ensure that algae and debris loosened during brushing are carried to the filter and removed from the water. Keeping the filter clean allows it to work efficiently, while proper circulation helps eliminate low-flow areas where algae are most likely to take hold.

    How Do You Do Weekly Pool Cleaning and Brushing Correctly

    A proper weekly pool cleaning and brushing session isn’t just brushing. It’s a sequence of steps that, done in order and done consistently, keeps the pool in good condition week to week.

    Tools That You Need

    • A pool brush matched to your surface type (nylon for vinyl or fiberglass, stainless steel for concrete or plaster)
    • A telescopic pole long enough to reach the far end of the walls and the pool floor
    • A leaf skimmer or net for surface debris
    • A vacuum head and hose
    • A water testing kit
    • Pool-safe chemicals: sanitizer (such as chlorine), pH adjusters, alkalinity increaser when needed, shock (for periodic oxidation), and algaecide if appropriate
    • A filter cleaner

    Each one of these tools handles something specific. Leaving any of them out usually means part of the job doesn’t get done.

    The Right Way to Brush a Pool

    1. Start at the waterline because that’s where oils and residue tend to collect first. From there, move down the walls in steady strokes, overlapping each pass so you’re not leaving strips unbrushed. The spots that need the most time are corners, steps, behind ladders, and any section of wall that sits in shade for most of the day, as algae find those first.
    2. Once the walls are done, move to the floor and push debris toward the main drain. That makes vacuuming faster and more effective right after.
    3. Timing matters, too. Early morning or late afternoon works better than brushing at midday because reduced UV exposure slows chlorine degradation after treatment

    How To Build A Routine That Works Well

    Pick one day a week and treat it as a fixed schedule. Here’s a basic checklist for each session:

    • Skim the water surface for debris
    • Brush the waterline, walls, steps, corners, and ladders
    • Vacuum the pool floor
    • Empty skimmer and pump baskets
    • Test water chemistry (chlorine, pH, alkalinity)
    • Adjust chemicals where needed
    • Check filters and backwash or clean if necessary

    A routine done weekly can beat a thorough cleaning done once a month. Keep in mind that both consistency and hard work pay off in preventing algae in a pool.

    Benefits of Hiring a Weekly Pool Cleaning Service

    Hiring a weekly pool cleaning service helps keep your pool in excellent condition without adding another task to your schedule. In addition to routine cleaning, professional technicians monitor water chemistry, inspect equipment, and identify small issues before they become expensive repairs. The result is a cleaner, safer pool with less effort on your part.

    Professionals Do Differently

    Professional pool technicians do more than skim leaves and vacuum the pool. Through regular inspections, they can spot early signs of potential problems, such as subtle changes in water clarity,early signs of equipment wear, restricted water flow, or water chemistry trends that could lead to algae growth or equipment damage if left unaddressed.

    At Poolie, every weekly service includes a thorough inspection of essential equipment, including the pump, filter, and other key components. Routine checks help catch developing issues early, reducing the risk of unexpected breakdowns and helping your pool operate efficiently throughout the season.

    Amount of Time A Weekly Service Can Save

    Proper pool maintenance involves much more than a quick skim. Brushing surfaces, vacuuming, testing and balancing water chemistry, emptying baskets, and monitoring the filtration system can easily take an hour or more each week.

    A scheduled weekly pool cleaning service takes care of these tasks consistently, so you don’t have to remember maintenance schedules, purchase testing supplies, or worry about whether your pool is ready for the next swim.

    Long-Term Cost Savings

    Small equipment issues cost far less to fix when they’re spotted immediately. Filters that get cleaned on schedule last longer. Pumps that operate under normal conditions and receive regular maintenance generally have a longer service life.

    Poolie’s routine visits are structured to keep every part of the pool system in working order, which reduces the likelihood of more repair costs in the long run.

    Weekly Pool Maintenance Best Practices

    An effective weekly pool maintenance covers more than what is visible to the eye. Brushing and vacuuming handle the surfaces, while testing and inspecting catches problems before they become visible. That’s the difference between a weekly routine that prevents issues and one that just responds to them.

    Water Testing and Chemical Balancing

    pH, chlorine, and alkalinity don’t stay where you set them. They shift with usage, weather, and evaporation. When any of them drift out of range, algae have an easier time getting established, and the water can start affecting swimmers and equipment at the same time.

    Target ranges during summer:

    • Chlorine: 1–3 ppm (or maintain the appropriate free chlorine level based on your stabilizer (CYA) level)
    • pH: 7.2–7.8
    • Alkalinity: 80–120 ppm

    Weekly water testing helps catch water chemistry imbalances early, when small adjustments are usually enough to correct them. Addressing issues before they worsen helps protect both your pool water and equipment from more serious and costly problems.

    Spot Algae Before They Spread

    During each weekly session, check pool surfaces for the following signs:

    • Any discoloration: green, yellow, or dark patches on walls or floors
    • Slippery spots on steps or the pool floor
    • Water that stays cloudy after the filter has been running

    When you see any of these signs, don’t wait. Brush the area that same day, pull a water test to see where chemistry stands, and run the filter on an extended cycle. If the water still hasn’t cleared within 24 to 48 hours, a shock treatment might be the necessary next step.

    Preventative Measures Beyond Brushing

    A few habits reduce the risk of algae between weekly sessions, such as:

    • Using a pool cover when the pool isn’t in use, as it limits sunlight and keeps debris out
    • Trimming any landscaping close to the pool to cut down on organic material falling into the water
    • Consider using a preventative algaecide when appropriate, especially if your pool has a history of algae outbreaks. Maintaining proper sanitizer levels remains the primary defense against algae.
    • Shock the pool after large gatherings or storms

    Frequently Asked Questions About Weekly Pool Cleaning and Brushing

    1) How often should I brush my pool in summer?

    Most pools should be brushed at least once a week as part of a regular weekly pool cleaning routine. If your pool gets heavy use, receives full sun most of the day, or has a history of algae growth, brushing twice a week can provide better protection. It’s also a good idea to brush the pool after storms or large pool parties, as debris and contaminants can increase the risk of algae.

    2) Can I skip a week if my pool looks clean?

    It’s not recommended. A pool may look clean even when algae are beginning to grow on walls, steps, and other surfaces. Early algae growth is often invisible to the naked eye, so skipping a week of brushing and maintenance gives algae more time to establish themselves. Consistent weekly pool cleaning is much easier than treating a full algae outbreak.

    3) What should I do if algae keeps coming back?

    Recurring pool algae usually indicates an underlying maintenance issue. Start by making sure you’re brushing the entire pool, including corners, steps, behind ladders, and other low-circulation areas where algae commonly develop. Next, test your water chemistry to ensure your chlorine, pH, alkalinity, and stabilizer (cyanuric acid) levels are properly balanced.

    If algae continue to return despite proper brushing, balanced water chemistry, and periodic oxidation or shocking when appropriate, it’s time to contact a professional pool cleaning service. Persistent algae can point to circulation problems, filtration issues, or hidden algae colonies that require a more thorough inspection and treatment.

    Stay Ahead of Algae: Commit to a Weekly Pool Maintenance

    Algae can develop quickly when warm temperatures, organic debris, and unbalanced water chemistry come together. The best defense is staying consistent with preventive maintenance before algae have a chance to take hold. Regular care keeps your pool cleaner, safer, and easier to maintain throughout the swimming season.

    Weekly pool cleaning and brushing is one of the most effective ways to prevent algae growth while protecting your pool water, surfaces, and equipment. Combined with consistent pool maintenance, it helps keep water chemistry balanced, supports proper filtration, and reduces the risk of costly repairs caused by neglected care.

    If keeping up with your pool’s routine isn’t practical, Poolie’s weekly pool cleaning service can handle the work for you. From cleaning and water testing to chemical balancing and equipment inspections, our team helps keep your pool in excellent condition, so you can spend more time enjoying it and less time worrying about maintenance.

    If you’re ready to stop managing algae and want to start enjoying your pool’s beauty and comfort, reach out to Poolie by filling out the form below.

  • Why Your Pool Keeps Getting Algae After Shocking and How to Stop It

    Why Your Pool Keeps Getting Algae After Shocking and How to Stop It

    Are you wondering why your pool keeps getting algae even after you’ve shocked it? If algae keep coming back, you’re likely dealing with a problem that goes beyond a one-time treatment. While shocking is an essential part of pool algae treatment, it doesn’t always address the underlying cause. If the underlying issue isn’t corrected, algae can return even after repeated shocking.

    In this guide, we’ll break down the three main reasons your pool keeps getting algae despite repeated shocks. You’ll also learn what each problem means, how to identify it, and the steps you can take to stop algae from coming back long term.

    Reason #1: Inadequate or Ineffective Pool Shocking

    Shocking your pool is one of the most effective ways to kill algae, but it isn’t foolproof. In many cases, the problem isn’t the product itself but how the treatment is done.

    You might even think that shocking is enough. In reality, how you prepare the pool, how much shock you use, and when you apply it all affect whether the treatment eliminates the algae or only knocks it back temporarily.

    Failing to Prep the Pool Before Shocking

    Algae don’t just float in the water. It clings to walls, steps, ladders, and even behind light fixtures, where chlorine has a harder time making direct contact.

    If you shock without brushing these surfaces first, algae attached to those areas may be protected by biofilms, rough surfaces, or crevices that limit chlorine contact. The chlorine treats the surrounding water, but the remaining algae can survive and begin multiplying again, allowing the bloom to return.

    Before shocking your pool, thoroughly brush all surfaces to loosen algae. Then skim and vacuum any debris so the chlorine can reach and destroy the remaining algae more effectively.

    Not Using Enough Shock

    Using too little shock is one of the most common reasons algae return shortly after treatment.

    Every pool requires a shock dose based on its water volume and the severity of the algae outbreak. If the free chlorine level never reaches the concentration needed to kill the algae completely, some organisms survive and quickly multiply. In many cases, visible algae can return within just one or two days.

    Always follow the manufacturer’s dosage recommendations and adjust the amount when dealing with a severe algae bloom. If algae are already well established, a single shock treatment may not be enough. In many cases, maintaining elevated free chlorine levels until the algae are completely eliminated is more effective than a one-time application.

    Poor Shock Application Timing

    Even if you use the correct amount of shock, treating your pool during the day can significantly reduce its effectiveness.

    Sunlight’s ultraviolet (UV) rays rapidly break down unstabilized free chlorine. Even in pools with cyanuric acid (CYA), which helps protect chlorine from UV light, some free chlorine is still lost during the day.

    For the best results, shock your pool after sunset and let the pump and filter run overnight. This gives the chlorine several uninterrupted hours to work before sunlight begins reducing free chlorine levels the next morning.

    Reason #2: Imbalanced Pool Chemistry Undermines Pool Algae Treatment

    Even a correctly dosed shock treatment won’t fully work if your water chemistry is off. Chlorine needs specific conditions to be effective, and when those conditions aren’t right, pool algae treatment falls short, no matter how much shock you use.

    High Cyanuric Acid (CYA) Levels (“Chlorine Lock”)

    CYA protects chlorine from sunlight, which is useful up to a point. When CYA levels become too high, they reduce the amount of active chlorine available to kill algae efficiently. Many pool owners refer to this as “chlorine lock,” although the issue is actually caused by excessive CYA reducing chlorine’s sanitizing power rather than locking it completely.

    Target range: Generally 30-50 ppm for most outdoor chlorine pools. If your CYA reads well above that range, partially draining and refilling the pool with fresh water is usually the most reliable solution. While chemical CYA reducers are available, they tend to work best for mild elevations and are often less effective when CYA levels are very high.


    Incorrect pH, Alkalinity, or Calcium Hardness

    Chlorine’s effectiveness drops when pH moves outside its working range. High pH reduces the amount of active chlorine available for sanitizing. Low pH, on the other hand, creates water  that is corrosive and uncomfortable for swimmers.. Either way, imbalanced water chemistry makes it more difficult to control algae.

    To keep them within range, keep these levels in mind:

    • pH: 7.2 – 7.6
    • Total Alkalinity: 80 – 120 ppm
    • Calcium Hardness: 200 – 400 ppm for most plaster pools (vinyl-lined and fiberglass pools often require lower calcium hardness levels).

    Test weekly. Adjust with the appropriate increaser or decreaser based on what your results show.

    Phosphates and Nitrates: Algae’s Nutrient Source

    Phosphates and nitrates are nutrients that algae use to grow. They enter the water through rain, leaves, fertilizer runoff, and even from swimmers’ oils, sunscreen, and lotion. When phosphates and nitrates are elevated, algae have a ready food source. While shocking can still kill algae when free chlorine is maintained at the proper level, reducing these nutrients can make it easier to prevent future algae blooms.

    Test for phosphates using a specialized kit available at most pool supply stores. If levels are high, use a phosphate remover and remove leaves and other organic debris regularly to help limit future phosphate buildup.. Regular filter cleaning also helps reduce buildup in the long run.

    Reason #3: Poor Circulation, Filtration, or Hidden Algae Havens

    Good chemistry and correct shock dosing won’t solve a pool algae control problem if water isn’t reaching every part of the pool. Algae grow in still water, and most pools have at least a few spots where circulation is weak.

    Dead Spots and Inadequate Circulation

    Corners, behind ladders, under steps, and around built-in benches are common dead spots. Sanitizer doesn’t reach these areas as effectively as it should, giving algae places to survive even after treatment.

    Adjusting your return jets to push water into those zones is an effective way to improve circulation and help prevent algae growth. Regularly brushing those areas also helps break up algae and biofilms so sanitizer can reach them more effectively. If your pool’s layout makes circulation difficult, an automatic cleaner or additional return jet can make a difference.

    Dirty or Ineffective Filter

    Your filter plays a major role in removing algae from the water, but it can’t do its job if it’s clogged or overloaded.

    After an algae outbreak, the filter traps a large amount of dead algae and other organic debris. If it isn’t cleaned promptly, its efficiency drops, making it harder to remove any remaining algae or contaminants. In some cases, a neglected filter can even contribute to algae returning after what seemed like a successful treatment.

    Clean or backwash your filter after an algae treatment, following the manufacturer’s recommendations. Cartridge filters should be rinsed thoroughly or soaked in a manufacturer-approved filter-cleaning solution to remove trapped debris. Skipping this step is one of the most common reasons algae reappear shortly after treatment.

    Algae Hiding in Equipment and Accessories

    The pool itself isn’t the only place where algae can survive. Pool toys, nets, vacuum heads, brushes, pool floats, and even swimsuits can carry algae back into clean water. It’s a tiny detail that gets missed most of the time.

    After an algae outbreak, clean and disinfect reusable pool equipment before using it again. Many pool owners use a properly diluted bleach solution or another appropriate disinfectant, following the product label directions. Wash swimsuits according to the garment care label, and don’t forget to clean skimmer baskets, pool covers, and any other accessories that came into contact with the contaminated water.

    How to Break the Cycle (Step-by-Step Solutions)

    Breaking a recurring algae problem means addressing chemistry, cleaning, and filtration at the same time. It’s more than just a one-time cleaning.

    Test and Balance Water Before Shocking

    Before adding any shock, test your water and correct whatever is off:

    • pH: target 7.2–7.6
    • Total Alkalinity: target 80–120 ppm
    • CYA: target 30–50 ppm for most outdoor chlorine pools
    • Free Chlorine: know your current level so you can raise it appropriately during treatment

    Shocking unbalanced water can reduce the effectiveness of the treatment and make it more difficult to eliminate algae completely.

    Brush, Vacuum, and Remove Debris Thoroughly

    Brush all surfaces: walls, floor, steps, ladders, corners. Pay special attention to areas with poor circulation, such as behind ladders, under steps, and around benches. Vacuum the floor slowly so you pick everything up that’s been loosened. Finally, skim leaves and other floating debris from the surface before shocking. These actions help chlorine reach and destroy algae more effectively.

    Shock the Pool Correctly

    Use the right amount based on algae type and severity. Always follow the manufacturer’s directions for your specific shock product. Some granular shocks are broadcast directly into the pool, while others may require pre-dissolving according to the label. For best results, shock after sunset and let the pump run overnight.

    Run Filter Nonstop and Clean It After Treatment

    Run your filter continuously for 24-48 hours after shocking. Clean or backwash it as needed, following the manufacturer’s recommendations and whenever the filter pressure indicates it’s time. Empty skimmer and pump baskets frequently during this period.

    Continuous filtration helps remove dead algae and suspended debris from the water, improving water clarity and reducing the chance of algae returning.

    Repeat Testing and Maintenance

    Retest chemical levels about 24 hours after shocking. Then test again every couple of days for the following week. Watch for cloudiness or surface slime because these are early signs that algae may be returning.

    Consistent weekly maintenance, including maintaining proper sanitizer levels, testing water chemistry, brushing, vacuuming, cleaning the filter, and ensuring good circulation, is what helps prevent algae from coming back.

    Frequently Asked Questions

    1) Why does my pool stay green after shocking?

    Your pool stays green even after shocking for one or more of these common reasons

    • The algae bloom required a higher chlorine level or longer treatment than a single shock application provided
    • Poor water circulation or filtration
    • Chemistry that’s out of range (especially pH or high CYA)
    • A filter that is clogged or overwhelmed with dead algae

    Check all four before adding more shock to your pool.

    2) Why does algae keep coming back in my pool?

    Algae keep coming back because the original outbreak wasn’t completely eliminated or because the conditions that allowed algae to grow weren’t corrected. Either the chemistry isn’t balanced before shocking, circulation or filtration is inadequate, or algae remain on pool surfaces or are reintroduced through equipment and accessories. Overlooking even one step in the treatment process can allow algae to return.

    3) Is it safe to swim in a pool with algae?

    It is absolutely not safe to swim in a pool with algae. Algae make pool surfaces slippery, reduce water clarity, and can indicate that sanitizer levels are not adequately controlling microorganisms. Poor visibility also makes it harder to see swimmers or hazards beneath the water.Wait until the algae is completely gone and your sanitizer levels are back in the normal range before letting anyone get in to swim.

    4) Can pool algae damage equipment or surfaces?

    Yes. Pool algae can damage equipment and surfaces by clogging filters, increasing strain on pumps, and contributing to stains on plaster, vinyl liners, or other pool finishes if left untreated.

    Treating pool algae promptly is always the best way to help prevent unnecessary wear and damage to your pool and equipment.

    5) Should I use algaecide after shocking?

    Algaecide works well as a follow-up after a major outbreak because it helps kill remaining algae and reduce the chance of regrowth. Add it after shocking, not before, unless the product label specifically directs otherwise, so high chlorine levels don’t reduce its effectiveness. Use a non-foaming formula and follow the dosage instructions on the label.

    Take Control and Enjoy an Algae-Free Pool

    When a pool keeps getting algae, it’s usually a combination of these things; shock that didn’t have the right conditions to work, chemistry that was off, circulation that left some areas untreated, or equipment that reintroduced algae after cleanup. The solution for these issues shouldn’t be complicated, but it rather requires handling all three areas in one, such as:

    • Effective shocking
    • Balanced water chemistry
    • Consistent circulation and filtration

    Skip one of these, and the other ones don’t fully hold.

    If you’ve tried several treatments and your pool is still not clearing up, that’s the right time to finally bring in a professional. Poolie serves pool owners across Texas with inspections, treatments, and pool maintenance that go further than what a standard shock routine can handle. Reach out by filling out the form below, and let’s figure out what action your pool truly needs.

  • Pool Algaecide Guide: How to Identify and Treat Green, Mustard & Black Algae in Texas

    Pool Algaecide Guide: How to Identify and Treat Green, Mustard & Black Algae in Texas

    Pool algaecide is a chemical treatment that kills and prevents algae growth in swimming pools. It works alongside proper chlorine levels to target algae, but it isn’t a replacement for maintaining adequate sanitizer. For Texas pool owners, getting the right pool algaecide is necessary. Algae can be rampant given the heat and the humidity of where the pool is located, and the long swim season lasts for that pool.

    Knowing which algae you’re dealing with and why it keeps coming back changes everything about how you treat it.

    Why Texas Pools Need a New Approach to Algae and Pool Algaecide

    Algae thrives in warm, sunny conditions, which makes Texas one of the toughest environments in the country for keeping algae under control. Success isn’t just about adding an algaecide. It requires maintaining proper water chemistry, sanitizer levels, and choosing the right treatment for the type of algae you’re dealing with.

    The Texas Climate Factor

    Texas summers can push algae growth into overdrive because temperatures above 100°F, intense sun, and heavy humidity all speed up how fast algae multiply. Strong sunlight rapidly breaks down unstabilized chlorine, making it harder to maintain adequate sanitizer levels. Meanwhile, frequent storms can also dilute your pool chemicals, introduce debris and nutrients, and create conditions where algae can quickly gain a foothold.

    Water Chemistry Challenges

    • Texas water tends to have high calcium hardness, creating rough surfaces where algae can cling more easily.
    • pH levels shift fast due to mineral-rich fill water, and when pH is off, both your sanitizer and algaecide lose effectiveness.
    • Maintaining proper pH, stabilizer (CYA), and free chlorine levels is essential for preventing algae and helping treatments work as intended.

    Types of Pool Algae in Texas: How to Identify and Treat Each One

    The three most common types of pool algae are green, mustard, and black. Each one looks different, grows in different areas of the pool, and requires a different treatment approach. If you use the wrong pool algaecide or treatment method, you’ll waste time and resources because it may not fully eliminate the problem.

    Green Algae (Chlorophyta)

    Green algae appear as cloudy green water or a slimy film on walls, steps, and fixtures. It feels slick, and that’s how you tell it apart from pollen and dust. In Texas heat, it can spread fast. A slightly hazy pool on Monday can look like a swamp by Wednesday, especially if chlorine levels drop. It often gathers in low-circulation areas like corners or behind ladders.

    Mustard Algae (Yellow Algae)

    Mustard algae are yellow-green and powdery. It settles in shaded, low-flow spots and looks similar to fine sand or pollen, which is why it often gets brushed off as nothing serious. It’s more chlorine-resistant than green algae and returns quickly to the same spots after cleaning. If a yellowish patch keeps reappearing in the same area, you’re likely dealing with mustard algae rather than ordinary dirt.

    Black Algae (Cyanobacteria)

    Black algae is actually a type of cyanobacteria rather than a true algae, but it’s commonly referred to as black algae in the pool industry. It appears as dark blue-green or black spots in cracks, grout lines, and rough plaster surfaces. It has a tough protective outer layer that resists brushing and many standard treatments. Texas pools with plaster or concrete finishes are especially vulnerable. It can penetrate porous surfaces, so successful treatment usually requires aggressive brushing, maintaining elevated chlorine levels, and, in many cases, an appropriate algaecide. The only permanent solution to removing black algae is replastering or resurfacing the pool.


    Quick ID Table: Types of Pool Algae

    Algae Type Color Texture Common Location Difficulty to Eliminate First Treatment Step
    Green Green Slimy, cloudy Walls, water, steps Easy Shock the pool, brush thoroughly, and use a broad-spectrum pool algaecide if needed
    Mustard Yellow-green Powdery Shaded, low-flow areas Moderate Brush thoroughly, perform a mustard algae shock treatment, and use a mustard-specific pool algaecide
    Black Dark blue/black Hard, spotted Grout, plaster, cracks Difficult Aggressively brush with a stainless steel brush (plaster only), maintain elevated chlorine levels, and apply a black algae treatment

    How to Get Rid of Algae in Pool Quickly: Texas Edition

    In Texas, speed is everything when dealing with pool algae. High temperatures can turn a small patch into a full-blown algae outbreak in as little as 24–48 hours under favorable conditions. Using the right pool algaecide alongside maintaining proper chlorine levels, vigorous brushing, continuous filtration, and proper water circulation is the most effective way to stop algae before it takes over.

    Green Algae Pool Treatment (Fast Results)

    For green algae pool treatment, combine cleaning with chemical treatment at the same time:

    • Brush all pool surfaces to break up algae colonies
    • Raise your free chlorine to shock level based on your stabilizer (CYA) level.
    • Add a broad-spectrum pool algaecide if recommended by the product label or for stubborn algae
    • Run your pump continuously until the water clears
    • Vacuum dead algae to waste when possible, and backwash or clean your filter frequently.

    Point your return jets to improve circulation throughout the pool and prevent algae from resettling during treatment.

    Mustard Algae Treatment (Texas-Specific)

    Mustard algae treatment requires more than a standard shock treatment because it’s more chlorine-resistant than green algae. Do the following:

    • Remove all pool accessories and clean them according to the manufacturer’s recommendations before returning them
    • Brush all surfaces, especially shaded and low-flow areas
    • Raise the pool to mustard algae shock level and apply a mustard-specific pool algaecide
    • Run the pump non-stop during treatment
    • After 24 hours, brush again and vacuum to waste

    Mustard algae can cling to pool toys, brushes, cleaner hoses, floats, swimsuits, and other equipment, so cleaning these items helps prevent it from returning.

    Black Algae Treatment (What Works in Texas)

    Black algae treatment takes persistence because one treatment is rarely enough:

    • Use a stainless steel brush (for plaster and concrete pools only) on each spot to break through the protective outer layer.
    • Apply an appropriate black algae treatment or algaecide directly to the spots immediately after brushing.
    • Raise free chlorine to an appropriate shock level and maintain it until the algae is eliminated.
    • Repeat the process as needed until the spots are completely gone.

    If black algae have rooted deeply into plaster or grout and keep coming back, that’s when professional help becomes necessary and a replaster of the pool may be required.

    Post-Treatment: Clearing Dead Algae and Restoring Balance

    • Vacuum to waste. Don’t run dead algae through the filter
    • Backwash or clean filters thoroughly
    • Test and adjust chlorine, pH, alkalinity, and stabilizer
    • Monitor water daily for one week and brush any returning spots right away

    Proactive Prevention for Texas Pools

    Preventing algae is less work and lower in cost than treating a full outbreak. A consistent routine is the most reliable defense Texas pool owners have.

    Weekly Habits That Matter:

    • Brush the pool walls, steps, and floor to remove algae spores before they can become established.
    • Test and balance the water, including free chlorine, pH, total alkalinity, calcium hardness, and stabilizer (CYA).
    • Consider adding a preventive dose of pool algaecide during the hottest months or if your pool is prone to recurring algae blooms. Always follow the product label instructions.
    • Empty skimmer and pump baskets to maintain proper water flow.
    • Check sanitizer levels regularly to ensure free chlorine stays within the recommended range for your pool’s CYA level.

    Adjusting Maintenance After Rain or Heatwaves

    Heavy rain and extreme heat can quickly throw your pool’s chemistry out of balance, creating ideal conditions for algae growth. After a storm or heatwave, test the water as soon as possible, restore free chlorine and pH to their recommended levels, shock the pool if testing indicates it’s needed, consider adding a maintenance dose of pool algaecide if your pool is prone to algae or the product label recommends it, and run the pump longer to restore proper circulation. Texas storms also introduce organic debris that increases chlorine demand, so taking action within the first day is much easier than dealing with a full algae bloom a day or two later.

    Equipment that may be worth upgrading:

    1. Variable-speed pumps to improve circulation and reduce operating costs.
    2. Higher-capacity filters or properly sized filtration systems to remove more spores between cleanings.
    3. Automation systems to monitor and maintain water chemistry more consistently than manual testing alone.

    When to Call a Texas Pool Algae Expert

    Most minor algae outbreaks can be handled with the right pool algaecide and proper maintenance. However, it’s time to call a professional if:

    • Algae keep returning after repeated shocking and algaecide treatments
    • Black algae persists after multiple aggressive treatment rounds
    • Water stays cloudy for days after treatment
    • You can’t stabilize water chemistry despite repeated adjustments
    • Your pump or filter isn’t working properly

    When algae problems become persistent, professional service can save both time and money. A pool technician can perform advanced water testing, inspect your equipment for underlying issues, and use commercial-grade treatments designed for the specific type of algae affecting your pool.

    Poolie takes that process a step further by identifying the root cause of recurring algae, not just treating what’s visible. By evaluating water chemistry, circulation, filtration, and maintenance practices, the team can recommend customized pool service maintenance plans for a long-term solution that will help prevent future outbreaks instead of repeatedly treating the same problem.

    Frequently Asked Questions

    1) Why do algae keep coming back after treatment?

    It is usually because of incomplete treatment, poor circulation, insufficient sanitizer levels, or using the wrong pool algaecide for the algae type. Brush every surface thoroughly, balance your water, and make sure your filter is clean and running properly.

    2) Is it safe to swim after adding algaecide?

    Most products require waiting until the product has circulated and the manufacturer’s recommended wait time has passed, which can range from 15 minutes to 24 hours depending on the product. Always check the label and confirm sanitizer levels are in the safe range before anyone gets in, especially children and pets.

    3) Can I just use household bleach or shock instead of algaecide?

    Shock helps, but it’s not always enough, especially for mustard or black algae. Regular, unscented household bleach contains the same active ingredient as liquid pool chlorine (sodium hypochlorite), but it is typically sold at lower concentrations and isn’t intended or labeled for routine pool sanitation. Specialized pool algaecide is formulated to help prevent or control algae alongside proper chlorine levels, rather than replace them.

    4) Do I really need to brush if I am shocking the water?

    Yes. Brushing breaks algae loose from surfaces and exposes it to chemicals. Without it, algae survive in crevices even after shocking. Brush before and after treatment for best results.

    5) What is the average cost of professional pool algae removal?

    Professional algae removal costs vary widely based on the severity of the bloom, pool size, location, and whether additional services like filter cleaning or repairs are needed. Simple algae treatments may cost a few hundred dollars, while severe algae cleanups can cost considerably more. Most services include water testing, brushing, vacuuming, treatment, and filter cleaning or filter maintenance.

    6) What kills algae permanently?

    No single treatment eliminates algae for good. Consistent sanitizer levels, routine brushing, correct use of pool algaecide, and proper filtration give you the best long-term results. Algae control is ongoing maintenance, not just a one-time fix. Black algae will often require replastering or resurfacing as the spores embed deeply into the plaster itself and can return 1-2 times per year.

    Winning Your Texas Pool with the Right Pool Algaecide

    Texas conditions make algae harder to prevent and harder to treat, but most outbreaks are manageable when you identify the right algae type and match it to the right treatment. Green algae pool treatment, mustard algae treatment, and black algae treatment each follow a different path, and using the correct pool algaecide for each one is what works wonders.

    Be consistent with your pool maintenance, act fast as soon as you notice that something is off, and don’t let a small patch sit until it takes over everything. If algae keep returning no matter what you do, Poolie’s team is ready to help. Fill out the form below and get a treatment plan built around what your pool truly needs.

  • Chlorine Lock: Why Your Pool Chlorine Stops Working (and How to Fix It)

    Chlorine Lock: Why Your Pool Chlorine Stops Working (and How to Fix It)

    You add chlorine, you wait, and test the water; only to find your chlorine level is still low. One possible culprit is chlorine lock. This happens when cyanuric acid (CYA) builds up to the point where it significantly reduces chlorine’s sanitizing effectiveness, leaving your pool looking fine on the surface but it’s not properly protected.

    This problem shows up most often in the summer, especially in July. Between the intense heat, stronger UV exposure, and frequent chlorine use, CYA levels can climb quickly and throw your pool chemistry out of balance.

    This article explains what pool owners commonly refer to as chlorine lock, what causes it, how to spot the warning signs, and how to restore your pool’s chlorine effectiveness.

    What is Chlorine Lock? (And Why July Is the Breaking Point)

    Chlorine lock is the common name for a condition where cyanuric acid (CYA) levels become so high that they significantly reduce chlorine’s sanitizing effectiveness. Adding more chlorine at that point may not solve the problem unless the chlorine level is increased appropriately for the amount of CYA present or the CYA level is reduced.

    July is when this problem tends to surface most often. Intense sunlight, heavier swimmer traffic, and frequent chlorine treatments all become more common during the peak of summer. Since many stabilized chlorine products also add CYA, those levels can creep up over time until they begin interfering with your pool’s sanitizer.

    How CYA Works in Pool Water

    CYA serves an important purpose. It protects chlorine from being broken down too quickly by the sun’s UV rays. Without enough CYA, chlorine can disappear within hours on a hot Texas summer day, making it difficult to maintain proper sanitation.

    The key is keeping CYA within the right range. For most pools, around 30–50 ppm provides effective UV protection without significantly reducing chlorine’s performance. As CYA climbs above 70–80 ppm, a larger portion of the chlorine becomes temporarily bound to the stabilizer. While it’s still present in the water, less of it is immediately available to sanitize contaminants. That’s when the symptoms commonly referred to as “chlorine lock” begin to appear.

    Why Problems Spike in July

    A few things happen in July that don’t happen the same way in May or September:

    • Pools require more chlorine. Higher temperatures, longer days, and stronger UV exposure increase chlorine demand. Many homeowners respond by adding more stabilized chlorine tablets or shock, which gradually raises CYA levels.
    • Stabilized chlorine products add more CYA.
      Trichlor and dichlor products both contain CYA. Using them regularly through the season compounds what’s already in the water.
    • Heavy use means more contaminants. More swimmers, more sunscreen, more organic matter, all of which demand more from your chlorine, often leading to more frequent chlorine additions throughout the summer.

    A pool that tested fine back in May can quietly cross 100 ppm CYA by midsummer, often before anyone notices that something is off.

    Signs You Have a Chlorine Lock Problem

    The most telling sign of what many pool owners call chlorine lock is that your pool doesn’t respond to chlorine the way it should. Instead of improving after treatment, the water remains difficult to sanitize, often leading to cloudy water, algae growth, unpleasant odors, and swimmer discomfort.

    Chlorine Levels Don’t Improve the Pool

    You shock the pool, wait a few hours later, test the water again, and the water still doesn’t improve despite having measurable chlorine. That’s not normal. If your free chlorine level is consistently too low for your CYA level, or your pool continues to struggle despite adding chlorine, excessive cyanuric acid (CYA) may be reducing chlorine’s effectiveness.

    Algae, Cloudy Water, and Irritation

    When chlorine isn’t sufficiently active, it can’t keep algae, bacteria, and other contaminants under control. As a result, algae will begin to grow, the water may turn cloudy, and swimmers may experience red eyes or skin irritation. These issues often persist even after adding more chlorine because much of the chlorine is bound to CYA and less is immediately available to sanitize the water.

    Pool Test Results: High CYA, Low Free Chlorine

    High CYA alongside free chlorine that is too low for the measured CYA level  is one of the clearest diagnostic signals. Test over several consecutive days and write down the numbers. If the pattern holds, you’re not dealing with a one-time issue. You’re dealing with a chlorine lock.

    Strong Chlorine Odor (But No Sanitizing Power)

    If you notice a sharp smell coming off the water, it only means that you have an unclean pool. More often, it points to chloramines, which form when chlorine tries to react with contaminants such as sweat, oils, and ammonia compounds. The odor is essentially a sign that chlorine is being consumed faster than it can fully sanitize the water, and it usually means your pool needs more effective sanitation—not less chlorine.

    Diagnosing Chlorine Lock Like a Pro

    To determine whether high CYA is reducing your chlorine’s effectiveness, you need to test more than just free chlorine. You need to look at CYA, total chlorine, pH, and alkalinity together, then rule out anything else that could explain the numbers.

    Test Your CYA Level

    Use a dedicated CYA test, which is included in most comprehensive pool test kits. For most outdoor pools, the recommended CYA level is 30–50 ppm for most outdoor pools, though saltwater pools often operate in the 60–80 ppm range according to manufacturer recommendations.

    . If your reading is 80 ppm or higher, excess stabilizer may be reducing chlorine’s effectiveness and contributing to the symptoms commonly referred to as chlorine lock.

    Test Free, Combined, and Total Chlorine

    Each chlorine measurement tells you something different about your pool’s condition:

    • Free chlorine is the active sanitizer available to kill bacteria and algae.
    • Combined chlorine represents chlorine that has already reacted with contaminants to form chloramines.
    • Total chlorine is the sum of free and combined chlorine.

    If your free chlorine level is consistently too low for your CYA level, or your pool continues experiencing algae or cloudy water despite maintaining measurable free chlorine, excessive CYA may be contributing to the problem. Elevated combined chlorine can also indicate that your pool is struggling to keep up with contaminants.

    Check pH and Alkalinity

    Before blaming CYA, make sure your water balance is within the recommended range. Pool pH should sit between 7.2 and 7.6, while total alkalinity should be 80–120 ppm.

    High pH alone can significantly reduce chlorine’s sanitizing power, even when CYA is perfectly fine. Correcting pH and alkalinity first helps ensure you’re identifying the real cause of the problem rather than treating the wrong issue.

    Rule Out Other Problems

    Not every chlorine problem is caused by excess CYA. Debris, leaves, and organic matter can consume chlorine fast. A clogged filter or underperforming pump can also make chemistry problems worse.

    Before concluding that chlorine lock is the culprit, clean the pool, inspect your filtration system, and confirm your circulation equipment is working properly. Eliminating these common issues will give you a more accurate picture of what’s happening in your pool.

    How Pros Fix Chlorine Lock in Summer

    How to break the chlorine lock in a pool starts with addressing the underlying cause: excessive cyanuric acid (CYA). Once your CYA level is back under control, you can restore your pool’s sanitizing power and rebalance the water. Following these steps in order helps avoid wasting time, chemicals, and money.

    Step 1: Lower Cyanuric Acid (CYA)

    The most reliable method is a partial drain and refill. Drain and replace enough water to bring your CYA back into the recommended range. For moderately elevated CYA, this may require replacing 25–50% of the water. Higher CYA levels may require a larger water replacement.

    Commercial CYA-reducing products are available, but their performance can vary depending on pool conditions. For significantly elevated CYA levels, a drain and refill is generally the fastest and most reliable solution.

    Step 2: Restore Chlorine Effectiveness

    Once your CYA is back in the recommended range, adjust your free chlorine to the proper level based on your CYA concentration. If combined chlorine exceeds 0.5 ppm, follow your shock product’s directions or use breakpoint chlorination to eliminate chloramines.

    Step 3: Rebalance pH and Alkalinity

    Draining and refilling change your water’s baseline chemistry. Fresh water has its own pH and alkalinity. Test both right after the refill and get them dialed in before anything else goes into the pool. Chlorine performs better when the rest of the chemistry isn’t working against it.

    Step 4: Prevent Future CYA Buildup

    Test CYA about once a month during the swimming season, or after extended use of stabilized chlorine products, significant water replacement, or if you’re having trouble maintaining proper chlorine levels.

    How to Prevent High CYA (Chlorine Lock)

    To prevent chlorine lock all season, a pool chemical service schedule that includes regular CYA testing will catch problems before they become worse.

    Use the Right Chlorine Products

    Stabilized chlorine (trichlor tablets or dichlor shock) is useful when CYA is in range. When levels start climbing, switch to unstabilized options like liquid chlorine or calcium hypochlorite because neither of them adds CYA. Check product labels for terms like “stabilized” or “contains cyanuric acid” before adding anything to the water.

    Test Your Water Regularly

    Check your CYA level periodically throughout the swimming season, especially if you regularly use stabilized chlorine products. Also test your free chlorine, pH, and alkalinity on a routine basis so you can catch water chemistry issues before they become bigger problems.

    Monitor Water Loss and Top-Offs

    Topping off seems harmless, but it adds up. The dissolved chemicals, CYA included, stay behind while the water level drops, so refilling just makes them more concentrated. Keep track of how often you’re adding water and how much of it. After anything more than a minor top-off, run your tests again before assuming the current chemical routine still fits.

    When Should You Call a Pool Professional?

    Some situations are harder to resolve without professional help:

    • CYA is above 100 ppm, and repeated partial drains haven’t brought it down
    • Free chlorine won’t hold even after correct dosing
    • Algae keep coming back despite proper chemical additions
    • You’re not sure whether the issue is CYA, equipment, or something else

    A pool chemical service visit usually includes a full water panel test, equipment check, and a targeted treatment plan, not just a bag of shock.

    Frequently Asked Questions About Chlorine Lock

    1) Can I fix the chlorine lock without draining my pool?

    Yes, in some cases. Chemical CYA reducers may help when CYA levels are only slightly elevated, although results can vary depending on pool conditions. Once CYA gets above 80–100 ppm, a partial drain and refill is usually the more reliable solution. For severely elevated CYA, draining and replacing water is generally the fastest and most effective way to restore proper water chemistry.


    2) How often should I test Chlorine in summer?

    At a minimum, test your chlorine 2–3 times per week during the summer. For pools that get heavy use or a lot of sun, daily testing is even better. Always test after heavy rain, large pool parties, algae treatment, or shocking the pool.

    3) What’s the best Chlorine level for my pool?

    The ideal free chlorine level depends on your CYA level, but most residential pools should maintain between 1–4 ppm of free chlorine, with 2–4 ppm being a common target. Pools with higher CYA require proportionally higher free chlorine levels to maintain effective sanitation.

    4) Are Chlorine reducers worth it?

    For mild CYA problems, they’re a reasonable first option. However, their effectiveness can vary, and results aren’t guaranteed. When CYA is severely elevated, a partial drain and refill is typically faster, more predictable, and more effective than multiple chemical treatments.

    Outsmarting Chlorine Lock in July

    Chlorine lock is not the kind of problem that fixes itself. The longer elevated CYA sits in the water, the more chlorine you’ll burn through without results. Regular testing is the most practical thing you can do to catch rising CYA early, so you’ll almost always avoid the bigger fix.

    If you’ve already gone through the steps and the water still isn’t responding, that’s when it makes sense to bring in help.

    Poolie’s team handles how to fix chlorine lock situations regularly and can get your pool’s water chemistry sorted without trial and error. Fill out the form below and get your pool back to where it should be.

  • Pool Pump Overheating: 5 Warning Signs to Watch for This July

    Pool Pump Overheating: 5 Warning Signs to Watch for This July

    Is your pool pump motor running hotter than it should? That’s one of the first signs your pool pump may be overheating. It usually happens when you combine scorching outdoor temperatures, restricted water flow, longer run times, or poor ventilation around the equipment.. In places like Texas, July is when this problem shows up most often. Many overheating problems don’t happen without warning. Instead, they usually show small, easy-to-miss signs first. If you know what to look for, you can often address the problem before it leads to expensive motor repairs or replacement.

    In this guide, we’ll walk you through the five most important warning signs, what causes them, and what you can do about them.

    Why Pool Pump Overheating Peaks in July

    Overheating peaks in July because it is when heat, pool usage, and run times are at their highest point at once. Temperatures stay above 100°F for days in a row. Even under normal conditions, a running pump motor naturally generates heat, and when the surrounding air is already extremely hot, it has a harder time shedding that excess heat.. When the surrounding air is already so hot, there’s no way for extra heat to escape. If the equipment pad receives direct afternoon sun or has poor ventilation, temperatures around the motor can climb even higher.

    At the same time, you’re using the pool more. The days are longer, so there are more people swimming, and more leaves and dust end up in the water. As a result, many pools that run around 8 hours per day in the spring may benefit from 10 to 12 hours of circulation during the hottest part of summer, depending on the pool, equipment, and water conditions. Heat alone is usually manageable, and longer run times aren’t necessarily a problem by themselves. But when high temperatures, extended operation, restricted water flow, or poor ventilation occur together, even well-maintained equipment can begin to show signs of strain.

    5 Signs Your Pool Pump is Overheating

    An overheating pool pump often shows one or more warning signs before it fails. Common symptoms include strange noises, weak water flow, sudden shut-offs, a motor that feels excessively hot or smells like it’s burning, and visible leaks or warped components.

    1. Unusual or Loud Noises from the Pump

    A healthy pump sounds like a steady, low hum. If you start hearing grinding, screeching, or rough rattling, something inside the motor or pump is likely wearing out. Excessive heat can break down bearing lubrication and increase friction, causing bearings and other moving components to wear faster. Left unchecked, those noises usually become louder as the damage progresses.

    2. Weak Water Flow or Low Suction

    Weak water flow and overheating often go hand in hand. Restricted water flow forces the pump to work harder, which can contribute to overheating.

    • Pool jets pushing water with much less force than usual
    • The skimmer basket stops pulling in leaves and debris
    • Air bubbles appearing in the basket or coming out of the pool returns

    A slow drop in flow might mean there’s a blockage, a dirty filter, an air leak, or another issue making the pump work harder. Left unresolved, those conditions can increase motor temperatures and accelerate wear.

    3. Frequent Shut-Offs or Tripped Breakers

    Most newer pool pumps have built‑in protection. If the motor gets too hot, it automatically cuts power to save itself. One random shut‑off on the hottest afternoon of the year might not be a big deal. But if it keeps turning off, or if your circuit breaker trips every day or two, it means that there is an underlying problem.

    If the breaker has tripped, reset it once after allowing the motor to cool and check for obvious issues like clogged baskets or a dirty filter. If the breaker continues to trip, stop using the pump and have it inspected.

    4. Hot Pump Housing or Burning Smell

    The pump casing will feel slightly warm when it’s running normally, and that’s totally fine. But if it’s too hot to comfortably keep your hand near or briefly on the motor housing for more than a second or two, the motor is running way past its safe limit.

    Tip: Check it with the back of your hand, held close, and don’t press directly against the surface to avoid getting burnt.

    5. Leaks, Melting, or Deformation

    When heat stays high for too long, it damages the pump from the outside in, too. Seals start to loosen and drip, while plastic parts soften and lose their shape. During your weekly check‑ups, keep an eye out for:

    • New puddles of water beneath the pump
    • Warped or discolored fittings
    • Softened or cracked plastic components

    If you see any of these, the pump may already have sustained heat-related damage.. At that point, it’s best to have a professional look it over to see what can be saved.

    What Causes Pool Pump Overheating?

    Pool pump overheating is often caused by a combination of environmental conditions, mechanical or electrical problems, and operating or maintenance habits. It’s rarely the result of a single factor.

    Environmental Factors

    High air temperatures, direct sunlight, and restricted airflow around the equipment make it more difficult for the motor to dissipate heat, increasing the risk of overheating.

    • Add shade using a canopy or slatted fence panel
    • Clear away leaves, boxes, or plants so air can move freely around the pump
    • If adding shade, be sure it doesn’t restrict airflow around the equipment.

    Mechanical and Electrical Causes

    Anything that blocks water flow or forces its components to work harder can generate excess heat. Common causes include:

    • Clogged skimmer baskets, pump baskets, or filters
    • Worn bearings that create excess friction
    • Old or damaged electrical wiring
    • A dirty or failing pump impeller
    • Low water level allowing air into the system

    Restricted flow is one of the most common contributors to overheating, but it’s also one of the easiest to prevent. Clean skimmer baskets, pump baskets, and filters regularly to keep water moving efficiently. You should also pay attention to unusual noises that may indicate worn bearings. An annual inspection by a qualified pool professional can also help identify worn electrical connections, failing bearings, or other developing issues before they lead to overheating.

    User Errors

    Sometimes, the biggest contributor to pump overheating is how it is operated. Some of the most common mistakes include:

    • Running the pump during the hottest part of the afternoon
    • Skipping cleanings because the water still looks clear
    • Ignoring new or unusual noises and putting off inspection

    Fortunately, these are easy habits to change. Run your pump during the cooler morning or evening hours whenever possible, stick to a regular cleaning schedule regardless of how clear the water looks, and address unusual noises right away before they turn into more expensive repairs.

    What are the Hidden Dangers of an Overheating Pool Pump?

    The hidden dangers of an overheating pool pump include permanent motor damage, electrical hazards, and declining water quality that can eventually become unsafe for swimmers. A quick check costs almost nothing compared to dealing with any of these consequences:

    Permanent Motor and Pump Damage

    The motor is usually the first part to suffer. When temperatures stay too high, the motor’s winding insulation can break down, bearings can wear prematurely, and seals and other components may fail. Over time, these issues can lead to complete motor failure. Watch for these signs of serious damage:

    • The pump won’t start again even after it’s cooled down
    • It continues making grinding or screeching noises when restarted.
    • You smell something burnt coming from the casing

    Addressing the problem early may prevent more extensive damage. Waiting too long increases the likelihood of costly repairs or motor replacement.

    Electrical Hazards and Fire Risk

    Excessive heat can gradually degrade the insulation around electrical wiring and motor windings. . In the long run, this raises the chance of short circuits, tripped breakers, and, in extreme cases, fire. In Texas, most pool equipment sits right next to homes and dry summer grass. If you notice a burning smell or a breaker that repeatedly trips, turn off power to the pump and contact a qualified pool equipment technician or electrician.


    Water Quality and Health Concerns

    Good circulation is what keeps your water safe. When an overheating pump slows down or stops completely, chlorine and sanitizer can’t spread evenly. During hot summer weather, algae can begin developing within a day or two if circulation and sanitation are interrupted. Taking care of your pump is the same as taking care of your water.

    How to Keep Pool Pump from Overheating: July Prevention Checklist

    To help keep your pool pump from overheating, build a few simple maintenance habits into your routine. These steps can significantly reduce the risk of a mid-summer breakdown.:

    1) Inspect and Clean Regularly

    Check skimmer baskets, pump baskets, and filters every week. Even a small amount of debris slows water flow and forces the motor to work overtime. Backwash or rinse your filter as recommended by the manufacturer, or sooner if the filter pressure rises significantly or there’s been a storm.

    2) Improve Equipment Ventilation

    Provide shade when practical while maintaining plenty of airflow around the equipment.. A slatted cover or canopy works perfectly. Make sure nothing is stacked against the pump and plants aren’t growing too close around it.

    3) Run Pumps During Cooler Hours

    If your schedule allows, run more of your pump’s circulation during the cooler morning or evening hours to reduce heat stress on the motor. However, make sure the pump still runs long enough during the day to maintain proper water circulation and sanitation, especially during periods of heavy pool use.

    4) Check for Leaks and Wear

    Every time you do maintenance, take a quick look at seals, hoses, and fittings. A small drip now is easy and cheap to fix. Ignoring leaks can reduce system efficiency, allow air into the plumbing, or place additional strain on the pump, increasing the risk of overheating over time. Replacing a worn seal costs little. Ignoring it until the motor seizes costs a lot more.

    5) Schedule Professional Pool Motor Repair or Maintenance

    Book a service visit in late spring, right before the heat really kicks in. A trained technician can spot things you might miss, like worn bearings, loose electrical connections, or early signs of heat damage. Regular upkeep can easily add years to your pump’s life.

    What to Do if Your Pool Pump is Overheating

    If you notice signs of trouble, follow these simple steps first: turn the pump off, let it cool down completely, then look for obvious maintenance issues before attempting to restart it. Acting quickly can mean the difference between a quick clean‑out and a major repair.

    Immediate Steps

    Turn the pump off and let it rest. Don’t try to restart it while it’s still hot; that only adds more stress. Once it’s cool enough to touch safely:

    • Empty out the skimmer and pump baskets to remove any blockages
    • Check the ground underneath for water or leaks
    • Look and smell for any signs of overheating, such as a burning odor coming from the motor or electrical components.

    If it was just a clogged basket, clear it out, turn it back on, and monitor it during the next operating cycle for any recurring symptoms.. If anything still feels off, stop and get help instead of pushing it.

    When to Do DIY vs. Call for Pool Motor Repair

    You can safely handle the basics yourself: cleaning filters, emptying baskets, and tightening a loose fitting. But call a pool motor repair expert right away if you see any of these:

    • It keeps shutting off or tripping breakers even after cleaning
    • You smell burning coming from the motor or the electrical box
    • Parts look melted, warped, or misshapen
    • Water flow stays weak no matter what you do
    • The motor hums but won’t start.
    • You see sparks or smoke

    Debris issues are easy to fix yourself. Heat-related motor damage and electrical repairs should be handled by a qualified pool equipment technician or electrician.

    Frequently Asked Questions (FAQ)

    1) Can a pool pump overheating affect my pool’s water chemistry?

    Yes. If an overheating pump slows down or shuts off, water circulation is reduced. Without proper circulation, chlorine and other pool chemicals can’t distribute evenly, which can increase the risk of cloudy water, algae growth, and poor sanitation. After the pump is repaired, test and rebalance the water as needed.

    2) Does the type of pool pump (single-speed vs. variable-speed) affect overheating risk?

    Because they often run at lower speeds, variable-speed pumps typically generate less heat and place less strain on the motor than single-speed pumps. While any pump can overheat if airflow or water flow is restricted, variable-speed models generally operate more efficiently.

    3) How long should a pool pump run each day during hot weather?

    Most residential pools need about 8 to 12 hours of circulation per day during the hottest months, although the ideal run time depends on factors such as pool size, weather, bather load, and equipment. Many homeowners choose to run more of their circulation during the cooler morning or evening hours, but make sure the pool still receives enough circulation to maintain water quality throughout the day.

    4) Can landscaping or pool enclosure design help prevent pool pump overheating?

    Absolutely, as long as you don’t block airflow. Shrubs, fences, and open shade structures keep the sun off the equipment. Just make sure whatever you use still lets air move around it. Lattice panels and slatted covers work great because they give shade without trapping heat.

    5) Can I prevent overheating with smart sensors or monitors?

    Some smart pool systems and pump controllers can monitor pump performance, water flow, power usage, or equipment status and alert you if something isn’t operating normally. While most residential systems don’t directly monitor motor temperature, they can help you identify problems before they lead to overheating.

    Stay Cool: Protect Your Pool Equipment This July

    Every sign we’ve covered, from a new noise to a slightly warped fitting, is just your pump asking for a little attention before it stops working entirely. Make it a habit to check your equipment just as often as you test your water.

    Poolie offers inspections, maintenance, and repairs all summer long across Texas. One quick visit now can make sure your pump is ready to handle the hottest weeks ahead. Fill out the form below or give us a call, and let us take the worry out of keeping your pool running smoothly.

  • Swimming Pool Pump Maintenance: How High Bather Loads Strain Your System

    Swimming Pool Pump Maintenance: How High Bather Loads Strain Your System

    Have you ever noticed how a pool that’s been fine all summer suddenly turns cloudy the Monday after a big weekend? It almost always comes down to how many people were actually swimming in the pool. That’s where proper swimming pool pump maintenance becomes essential because the more swimmers there are, the harder your system has to work to keep the water clean and balanced.

    In this guide, we’ll explain how heavy pool use affects your circulation and filtration system, why pool sanitation becomes more challenging after periods of high use, when it’s time to schedule a pool filter cleaning service, and how it will affect your overall pool maintenance routine.

    Understanding Bather Load and Its Role in Swimming Pool Pump Maintenance

    Bather load is the number of people swimming in your pool over a stretch of time, and it directly affects water quality and your pool’s circulation and filtration system. More swimmers equate to more oils, sweat, sunscreen, and general debris hitting the water at once. This is why swimming pool pump maintenance shouldn’t follow the exact same schedule year-round, especially during periods of heavy pool use.

    Defining Bather Load in Pool Maintenance

    At home, this usually looks like a family swimming a couple of times a week, with the occasional spike when people come over. Commercial pools are in a different category entirely because hotels, gyms, and community centers may have dozens or even hundreds of swimmers each day, placing significantly greater demands on their circulation, filtration, and sanitation systems.

    Key Factors That Influence Bather Load

    A handful of things tend to drive the bather load up (or keep it low), such as:

    • Parties and get-togethers, which bring in extra sunscreen and body oil all at once
    • Hot weather, since people naturally want to swim more when it’s cruel outside
    • Smaller pools hit their limit faster with fewer people
    • Summer weekends and holidays being the usual culprits

    Special events can spike bather load fast, sometimes without much warning. Knowing which weekends are likely to be busy at least gives you a chance to prepare ahead of time.

    How Bather Load Stresses Pool Systems and Increases Maintenance Needs

    When more people are in the water, your circulation and filtration system have to process a much higher volume of contaminants. Your filter collects debris more quickly, and chlorine is consumed faster as it works to sanitize the water. If these increased demands aren’t addressed, you may end up with cloudy water, reduced sanitizer levels, and a filter that requires cleaning more frequently.

    None of this requires a complete overhaul. All you need to do is tighten up your cleaning frequency and check your equipment often when you know a busy stretch is coming.

    How High Bather Loads Affect Your Pool Pump

    High bather loads affect your pool pump and filtration system because they increase the amount of contaminants that must be circulated, filtered, and sanitized.. It continuously moves water through the filter, distributes sanitizers and chemicals evenly, and helps maintain consistent water quality. When more people use the pool, the system has to process more debris and organic contaminants, which can cause the filter to clog more quickly and reduce water flow if maintenance is neglected. Over time, operating with restricted flow can place additional strain on the pump.

    Increased Circulation Demands and Debris Management

    Swimmers carry sunscreen, hair, body oils, and whatever’s stuck to their feet from the yard. The more people are in the pool, the more all of that stuff ends up in the water. This increases the amount of material your filtration system must remove and may require longer pump run times or more frequent filter cleaning to maintain clear water.

    Signs Your Pool Pump Needs Maintenance After Heavy Use

    After a busy stretch, it’s worth checking for a few things:

    • Grinding or screeching sounds from the pump housing
    • Weak flow from of the jets
    • Air bubbles showing up in the basket or return jets
    • The pump losing prime, or shutting off on its own for no clear reason
    • Visible debris jammed into the basket

    If you catch these early, you can often resolve the problem with simple maintenance, such as emptying the pump basket, cleaning the filter, or reseating a worn O-ring. Addressing restricted water flow early helps prevent unnecessary strain on the pump, reducing the risk of overheating or premature motor wear. A quick walk-around after a big weekend is all it takes to catch these issues.

    Essential Swimming Pool Pump Maintenance Tips During High Bather Loads

    A few habits can make a real difference. Empty the pump basket daily while usage is high. Check that the lid and O-ring are sealed properly so air isn’t being drawn into the system. Keep an eye on your filter pressure gauge, as a rising pressure reading can indicate that the filter is becoming clogged and restricting water flow.. Running the pump a little longer than usual helps improve water circulation, filtration, and sanitizer distribution after periods of heavy pool use. However, if you continue noticing poor circulation, unusual noises, low water flow, or the pump repeatedly loses prime, it’s probably time to have a qualified pool professional take a look.

    Pool Filter Challenges: Keeping Up with High Bather Loads

    Keep monitoring the filter because it traps everything that circulates through the filtration system. When bather traffic spikes, it’s the first piece of equipment to show signs of strain.

    How High Bather Loads Stress Your Pool Filter

    More people in the pool mean more hair, oil, and general debris for the filter to catch. Once that load gets heavy enough, the filter fills up faster than it normally does. Flow drops, the pressure gauge climbs higher than usual, and the water starts to look duller even though the pump is running just fine.

    Common Issues and When to Call a Pool Filter Cleaning Service

    If your pool stays cloudy despite regular cleaning, the return jets feel weaker than usual, the filter pressure remains high even after backwashing, or cleaning the filter, or you notice leaks around the filter housing, it’s time to take a closer look. When these problems persist despite routine maintenance, it’s often a sign that a deeper cleaning or inspection is needed. A professional pool filter cleaning service can disassemble the filter, remove stubborn buildup that isn’t accessible during routine cleaning, and identify worn or damaged components before they lead to more costly repairs.

    DIY Pool Filter Cleaning vs. Hiring a Pool Filter Cleaning Service

    Rinsing a cartridge or backwashing sand and DE filters as recommended by the manufacturer is fine for regular maintenance. These are things that owners can handle on their own. However, after a big event or when high filter pressure or poor water flow continues despite routine maintenance, that’s the time to call for a professional visit. A professional deep cleaning can restore filter performance and help identify problems before they become major repairs.

    Maintaining Pool Sanitation with Elevated Bather Loads

    Maintaining pool sanitation during periods of heavy use starts with keeping sanitizer levels where they need to be. Sanitizers are your primary defense against bacteria, algae, and other contaminants, but they’re consumed much faster when more people are using the pool because they must both sanitize the water and oxidize the additional organic contaminants introduced by swimmers.. Regular testing and timely adjustments help ensure the water stays clean, clear, and safe for everyone.

    Impact on Sanitizer Levels and Water Quality

    Every swimmer brings in sweat, sunscreen, and bacteria. Because of that, chlorine or bromine levels are consumed faster. Once the sanitizer falls too low, the water can become cloudy, develop unpleasant odors, and become more susceptible to algae growth. It can also result in skin and eye irritation for swimmers.

    Risks of Poor Pool Sanitation During Busy Periods

    This is about more than just water appearance. Germs like E. coli or Cryptosporidium can spread when sanitizer levels drop too low or become ineffective. It can result in rashes, ear infections, or even stomach issues for swimmers. That’s why sanitizer checks matter so much more right after a party than during a slow week.

    Monitoring and Adjusting Pool Sanitation for Optimal Safety

    Test the water before and after high-use periods, whether that’s with strips or a digital tester. Add sanitizer right away if levels drop below where they should be. A shock treatment after a big event can help oxidize contaminants and restore water quality, and if manual testing isn’t your thing, automatic chlorinators or smart monitors can take some of that off your plate.

    Proactive Swimming Pool Pump Maintenance for Before, During, and After Peak Usage

    Proactive swimming pool pump maintenance before, during, and after peak pool usage means preparing your equipment ahead of time monitoring your pool system during periods of heavy use, and performing follow-up maintenance once the pool returns to normal use.

    Preparing Your Pool for High Bather Loads

    As the weekend approaches and you know your pool is going to be busy, a little prep can help keep the water clear and reduce stress on your filtration system. Shock the pool the evening before or a day or two before if appropriate for your sanitizer levels, skim, and vacuum so the system starts clean. Also, don’t forget to empty the pump and skimmer baskets so the flow is not restricted. Finally, backwash or rinse the filter beforehand and run the pump a bit longer than usual during and immediately after periods of heavy use.

    Real-Time Pool Sanitation and Filter Checks

    While the event is happening, test sanitizer and pH every few hours. Watch out for sudden jumps in filter pressure. If the water starts looking cloudy or the jets weaken, address the issue promptly by checking water chemistry, emptying baskets if needed, and ensuring the circulation system is operating properly.


    Post-Event Pool Filter Cleaning Service and Maintenance Checklist

    Once things settle down, clear out debris, empty the baskets, backwash the filter, and retest the water. Check the pump and filter for anything unusual, such as noise, leaks, and the like. If cloudiness or high pressure sticks around even after all that, consider calling in a pool filter cleaning service instead of troubleshooting it yourself for another week.

    Long-Term Best Practices for Swimming Pool Pump Maintenance and Pool Sanitation

    Regular, ongoing care is what prevents most emergency repairs, not any single fix. Treat it less like a one-time tune-up and more like a weekly habit. These habits matter more over the course of a swimming season than people usually give them credit for.

    Scheduling Regular Pool Pump and Filter Inspections

    Once a month works fine for most residential pools, though it’s worth bumping that up to every two weeks during the busy season. During each check, look for odd noises, leaks near fittings, pressure readings that seem off, debris buildup, and any wear on seals or hoses.

    When to Schedule Professional Pool Equipment Maintenance

    DIY care covers routine maintenance, but a professional visit once or twice a year for most residential pools catches things that are easy to overlook. Commercial pools typically require much more frequent inspections and maintenance due to higher bather loads and local health regulations. When choosing a pool filter cleaning service, look for someone certified and insured with strong local reviews. Most importantly, ask upfront about what’s included in the service before you book anything.

    Keeping a Maintenance Log for Swimming Pool Pump Maintenance and Pool Sanitation

    A simple log, whether using a notebook or an app, can make it easier to spot patterns and plan ahead. Just jot down dates, what got checked or fixed, and anything that seemed off. It sounds unnecessary until it saves you from forgetting when a part was last replaced.

    Protect Your Pool with Proactive Pump Maintenance and Sanitation

    Busy pool days should leave you with great memories and not costly repairs. Every extra swimmer increases the demand on your pump, filter, and sanitizer, making regular maintenance essential to keeping your water clean and your equipment running efficiently. Staying ahead of small issues with routine inspections, timely chemical adjustments, and proper cleaning can extend the life of your pool system and help you avoid expensive breakdowns.

    If your pump isn’t performing as it should or your filter is struggling to keep the water clear, don’t wait for the problem to get worse. Poolie can inspect your system, identify the root cause, and recommend the right solution. Fill out the form below to schedule an assessment and keep your pool ready for every swim.

  • Cloudy Pool Water After Heavy Use: Causes, Fast Fixes & Prevention Guide

    Cloudy Pool Water After Heavy Use: Causes, Fast Fixes & Prevention Guide

    Cloudy pool water after heavy use can show up at the worst time, like the morning after a pool party when you expected everything to be back to normal. Cloudy water is more than a pool’s aesthetic issue. It often means your pool’s filtration system or water chemistry couldn’t keep up with the extra swimmer load. If it’s left unaddressed, it can reduce water clarity and make it harder to maintain a clean and safe swimming environment.

    In the sections ahead, we’ll reveal why cloudy pool water after heavy use happens, what to do about it, how to address it right away, and what are the best ways to prevent it.

    Understanding Cloudy Pool Water

    Cloudy pool water occurs when fine particles remain suspended in the water because there are more contaminants than the filter can efficiently remove or because the water chemistry is out of balance.. As a result, instead of achieving clear water, you’re left with something hazy. This is typically a chemistry and filtration problem, which usually shows up right after a pool experiences heavy use.

    What Is Cloudy Pool Water?

    Cloudy pool water is a water condition where your pool appears to be dull, milky, or foggy instead of looking clear and sparkling. It can also appear as a light haze that is barely visible unless you were intentionally looking for it.

    Why Does Heavy Use of the Pool Lead to Cloudiness?

    Using your pool heavily leads to cloudiness because more people in the water means more sweat, sunscreen, body oils, and outside debris are dumped all at once. This sudden increase in contaminants places additional demand on both your pool’s sanitizer and filtration system.

    Heavy swimmer use puts your pool’s water chemistry under more strain. Free chlorine gets used up faster as it works to break down everything swimmers bring into the water. As chlorine levels drop, more fine particles and contaminants remain in the water for your filter to remove. If the filter can’t keep up with the extra load, or if the water chemistry becomes unbalanced, the water starts to turn cloudy.

    Main Causes of Cloudy Pool Water After Heavy Use

    Cloudy pool water after heavy use is usually due to increased contaminants, depleted sanitizer levels, an overworked filtration system, or a combination of all these. Identifying the underlying cause helps you choose the right solution and restore clear water faster.

    Chlorine and Sanitizer Demand Spike

    When many swimmers enter the pool at the same time, chlorine is depleted much faster than usual. Every person introduces sweat, body oils, sunscreen, and other contaminants into the water, forcing chlorine to work harder to neutralize them. This increased workload is known as chlorine demand, and it can quickly reduce the amount of free chlorine available to keep your pool clean and properly sanitized.

    If your sanitizer can’t keep up with the increased demand, contaminants will start to accumulate instead of breaking down. As a result, the water starts looking cloudy. The longer sanitizer levels remain too low, the more difficult it becomes to restore proper water balance, so it’s best to address the problem as soon as you notice something isn’t right.

    Oxidant Demand and Organic Contaminants

    Sweat, body oils, lotion, and bits of debris tracked in from the yard all contribute to what’s known as oxidant demand. Basically, it’s a measure of how much organic junk your water has to deal with at any given time.

    Regular chlorine levels are sometimes not enough for a sudden spike like that, so superchlorinating (shocking) the pool after a party is still highly recommended, instead of treating the shocking process as optional. This provides enough additional sanitizer to oxidize accumulated contaminants and restore free chlorine levels more quickly.


    Filtration System Under Stress

    Your filter can only handle so much at a time. After a busy day, it might be dealing with more debris and fine particles than it was designed to handle, and that slows everything down.

    It might also show warning signs before performance drops. You may notice weaker water flow, a higher pressure reading, or dirt returning to the pool after cleaning. If any of that sounds familiar, cleaning or backwashing the filter (if applicable to your filter type) should be your next move.

    Equipment Stress Points

    Filters are not the only components feeling the strain during periods of heavy pool use. Pumps have to circulate water longer to keep up with the added contaminants, chlorinators dispense more sanitizer as chlorine levels drop, and skimmers collect more debris. This extra workload can reduce efficiency over time and lead to faster wear.

    After a party, spend a few minutes checking skimmer baskets and emptying them if needed to prevent clogs. Make sure your filter pressure remains within its normal operating range,, and confirm your chlorinator is dispensing sanitizer properly to help keep contaminants under control.

    Environmental and Weather Factors

    The weather has a way of making an already busy pool even worse. Rain, wind, and heavy pollen can add extra debris and organic material to your pool, making your systems have even more to handle.

    Storms tend to stir up dirt that has already settled. Windy days bring their own problem, blowing in grass clippings, dust, leaves, or other airborne debris you wouldn’t normally see. Keeping a pool cover on hand and staying ready to skim after weather rolls through can go a long way toward maintaining water clarity, particularly in a place with unpredictable weather.

    Step-by-Step: How to Clear Cloudy Pool Water After Heavy Use

    Clearing cloudy pool water after heavy use starts with testing, then treating things in the right order. Most pools can show noticeable improvement within a day or two, though the more serious issues can take a bit longer.

    Test Your Pool Water Immediately

    Testing tells you exactly what’s out of balance before you start dumping chemicals into the pool. Focus on:

    • Chlorine or sanitizer level
    • pH
    • Total alkalinity
    • Calcium hardness
    • Cyanuric acid (if your pool uses stabilizer)

    Low chlorine combined with an improper pH is the most common reason for cloudy water. If you’re unsure how to interpret your results , most pool supply stores can run the test for you and walk you through what it means.

    Shock the Pool (Superchlorination)

    Shocking means adding a large dose of chlorine or a non-chlorine oxidizer to break down the contaminants your regular sanitizer couldn’t keep up with. Most shock products are made to bring free chlorine up to somewhere around 10 ppm for a standard pool, but it’s still recommended to read the label and follow the manufacturer’s instructions.

    If you’re using granular shock, always add the chemical to a bucket of pool water if the product label requires pre-dissolving, never water the chemical. Liquid chlorine can be added directly to the pool according to the label instructions. Always keep the pump running while the shock circulates.  The water might actually look a little worse for a few hours right after, as particles start breaking apart, but it should begin clearing up within a day.

    Brush and Vacuum Thoroughly

    Brushing knocks loose particles and algae stuck to the walls, steps, and floor before they can settle back down. Work through the whole pool with a firm-bristle brush rather than hitting just a few random spots.

    Once you’ve brushed, vacuum slowly and go over the whole pool. Manual vacuums take more time but often reach corners and tight spaces that automatic cleaners can miss. If you’re using an automatic cleaner, empty the debris bag or canister before and after cleaning so it can collect debris efficiently.

    Run the Filter Continuously

    Your filter needs more time to recover from a party. Backwash or clean it when the filter pressure rises about 20–25% above the clean starting pressure, rather than on a fixed schedule, unless the manufacturer recommends otherwise.

    While cartridge filters may only need a rinse, sand or DE filters should be properly cleaned. A clean filter running continuously can significantly speed up water recovery and help clear cloudy water more quickly.

    Use Clarifiers or Flocculants (If Needed)

    If the water remains hazy after shocking and filtering, a clarifier or flocculant can help. Clarifiers group tiny particles together so your filter can catch them. Meanwhile, flocculants make particles clump and sink so you can vacuum them out directly.

    When using a flocculant, turn off the pump overnight to allow suspended particles to settle at the bottom of the pool. The next day, vacuum the debris directly to waste, if your filtration system allows,. Be sure to follow the manufacturer’s dosing instructions, as using too much flocculant can worsen water clarity and make the cleanup process more difficult.

    Retest and Rebalance Chemicals

    When water starts to look clearer, retest before letting anyone back in the pool. A general rebalancing checklist looks like this:

    • Chlorine or sanitizer: 1 – 3 ppm (or follow your sanitizer manufacturer’s recommendations)
    • pH: 7.4 – 7.6
    • Total alkalinity: 80 – 120 ppm
    • Calcium hardness: 200 – 400 ppm
    • Cyanuric acid: 30 – 50 ppm (for outdoor pools)

    Adjust whatever needs adjusting before declaring that the job is done.

    Advanced Troubleshooting: Cloudy Water Treatment

    This is where the cloudy pool water treatment solutions need to go past the basics we’ve already covered because when the usual fixes don’t do the trick, the problem is more likely something a standard test kit won’t catch, such as high phosphates, metals, or equipment that’s quietly failing.

    If you encounter persistent cloudiness, then it might be time to take a thorough look at your water and your equipment. A professional water analysis can spot phosphates, metals, or stabilizer issues that home kits miss more often. Consider also bringing a pool professional in to physically inspect your pump, filter, and chlorinator.

    Prevention: How to Avoid Cloudy Water After Heavy Use

    Preventing cloudy water takes a lot less effort than waiting for worse situations before fixing it. All it needs is a bit of preparation before and after your events.

    Pre-Party Preparation

    Balance your chlorine, pH, and alkalinity a day or two before the upcoming event so your pool will be in good condition. A preventative shock the evening before the event can also help, especially before large gatherings or periods of heavy pool use, giving your sanitizer levels a head start. While you’re at it, check your filter and empty the skimmer and pump baskets if needed and clean the filter if it’s due for maintenance.

    During the Party: On-the-Spot Tips

    Encourage guests to rinse off before getting into the pool. It helps reduce the amount of sunscreen and body oils that end up in the water. It also helps to keep the foods and drinks away from the pool edge and skim off visible debris throughout the day.

    Immediate Post-Party Actions

    Skim the surface and empty the baskets as soon as the last guest leaves. Shock the pool the same night, and get the filter running immediately instead of waiting until the next morning. Testing the water that evening or the following morning gives you a head start on spotting any imbalances that need to be addressed.

    Ongoing Maintenance Best Practices

    A weekly routine of testing, brushing, checking filter pressure, and even keeping a simple log of your readings is highly encouraged to help prevent cloudy pool water.

    Frequently Asked Questions (FAQ)

    1) Why is my pool water cloudy?

    Your pool may become cloudy because of low sanitizer, an off pH, or a filter that’s not working well. After a gathering or an event, the extra sweat, oils, and debris from swimmers can push your pool’s chemistry out of range faster than it would on a normal day.

    2) How to clear cloudy pool water fast?

    Test the water first, then follow with shocking, brushing, vacuuming, and running the filter continuously for 24 to 48 hours. Add a clarifier or flocculant if it’s still hazy after all that. Most pools will show improvement within a day.

    3) Can I use household chemicals to clear my pool?

    No. Household chemicals can be harmful for your pool. They can damage pool surfaces or throw your pool chemistry off. Only use pool-specific chemicals for the safety of both your pool and your swimmers.

    Stay away from using:

    • Household bleach that isn’t labeled for pool use
    • Vinegar
    • Ammonia-based cleaners
    • Dish soap or laundry detergent

    4) What if my pool is still cloudy after shocking?

    If your pool is still cloudy after shocking, retest your water to confirm that chlorine, pH, and alkalinity are in the right range. Check the filter for clogs or a worn cartridge, brush and vacuum again, and look through the skimmer and pump baskets for obstructions. If none of that clears the water within a few days, it’s time to call in a professional to rule out high calcium hardness, elevated phosphates, algae, or filtration problems.

    5) How long does it take to clear cloudy pool water?

    Most pools clear up within 24 to 48 hours when they’re treated properly and promptly. If the problem is left untreated, it may take significantly longer to restore water clarity. Running the filter continuously and staying on top of testing during that window will help speed up recovery.

    Keep Your Pool Crystal Clear After Every Party

    Clearing cloudy pool water is easier once you identify the cause. Targeting the right chemistry level, filtration, and consistency is what it takes to achieve clear water, whether you’re dealing with cloudy water right now or wanting to stay ahead of the next one.

    If you want to have more effective pool maintenance, Poolie’s team can handle the testing, treatment, and equipment checks for you. Fill out the form below, and we’ll get your water back on track before the next gathering rolls around.

  • Calcium Buildup in Pool: Causes, Removal, Prevention & When to Call a Pro

    Calcium Buildup in Pool: Causes, Removal, Prevention & When to Call a Pro

    The white, crusty stuff along your waterline isn’t always dirt. A lot of people scrub it for weeks before realizing it won’t come off with ordinary cleaning alone. Calcium buildup in pool surfaces is something most Texas owners run into. It usually happens after periods of high heat and evaporation, especially when the pool’s water chemistry isn’t properly balanced. As water evaporates, dissolved calcium becomes more concentrated, increasing the likelihood of scale forming. It creeps up slowly, and by the time it’s obvious, it’s already hardened into something a sponge can’t easily remove.

    In the next sections, we’ll discuss where calcium buildup comes from, what it actually does to your pool in the long run, and what your options are for dealing with it.

    Understanding Calcium Buildup in Pools

    Before you can fix calcium buildup, you need to fully understand what calcium buildup is and why it forms. Some pool owners notice the symptom before understanding the cause, realizing that scrubbing alone rarely solves anything. Let’s begin by looking at what calcium buildup is truly about and why it forms.

    What is Calcium Buildup?

    Calcium buildup (also called calcium scale) occurs when pool water becomes oversaturated with calcium minerals, causing calcium compounds to come out of the water and harden onto pool surfaces. It usually appears as a chalky white deposit along tile lines or pool walls.

    Two types of calcium scaling show up most often:

    • Calcium carbonate: It is the white, flaky kind, usually tied to high pH or alkalinity, or elevated calcium hardness. It is generally the easier type of scale to remove.
    • Calcium silicate: A gray, denser deposit that bonds more strongly to pool surfaces and is much more difficult to remove. It often develops over time in pools with consistently high calcium hardness and elevated pH.

    Causes of Calcium Scale

    A handful of things usually line up at once when scale starts forming:

    • High calcium hardness
    • High pH
    • High total alkalinity
    • Hot weather that speeds up evaporation, concentrating dissolved minerals in the water
    • Hard fill water used to replace evaporation losses
    • Areas with poor water circulation, which can encourage localized scale formation

    Texas water leans hard in a lot of regions, so this tends to be more of an ongoing issue here than somewhere else with softer water. Once the chemistry becomes oversaturated with calcium, calcium carbonate can precipitate out of solution and form deposits on pool surfaces, especially around the waterline and tile.

    How Calcium Buildup Affects Your Pool

    Calcium buildup does more than affect your pool’s appearance. If left untreated for too long, it can gradually reduce the performance of your pool equipment and contribute to surface deterioration, leading to costly repairs. Many pool owners assume calcium scale is only a cosmetic issue because it often starts as a few white, chalky deposits around the waterline or on the tiles. However, once scale begins to form, it typically won’t go away on its own. Instead, it continues to spread, becoming thicker and harder to remove while affecting other areas of your pool.

    Aesthetic and Structural Issues

    Calcium buildup can make your pool look older and poorly maintained. Pool tiles lose their shine, surfaces become dull, and rough, chalky deposits develop along the waterline and other submerged areas. In severe cases, the pool floor and walls may even feel rough to the touch.

    The damage isn’t limited to what you can see. Scale can accumulate in grout lines, tiny cracks, and other small openings in your pool’s surface. Over time, these deposits can make surfaces more difficult to clean and may contribute to the deterioration of already weakened grout or tile joints. As the buildup becomes more stubborn, removing it often requires professional cleaning methods rather than simple brushing.

    Long-Term Consequences

    Beyond appearance, calcium buildup can reduce the efficiency of your pool system. Scale can build up on filter media, restrict water flow, and accumulate inside plumbing, pumps, heaters, and salt chlorination cells. As a result, your equipment has to work harder to keep the pool clean and properly circulated. That added strain can shorten the lifespan of pumps, filters, heaters, and other essential components, increasing maintenance and replacement costs over time.

    Addressing calcium buildup early is almost always more affordable than waiting until extensive damage occurs. Regular maintenance and timely professional cleaning can help preserve your pool’s appearance, protect its equipment, and prevent expensive repairs that could have been avoided.

    DIY Methods for Removing Calcium Buildup

    If you have enough time and the right tools, you can manage to handle mild to moderate buildup. However, heavier, longstanding scales are different. Trying to fix it on your own and using the wrong tools can do more harm than good. If you choose to DIY,  be mindful of the proper methods and the right tools you’ll use.

    Basic Cleaning Tools and Supplies

    Here’s what you’ll need before getting started:

    • Pumice stone (for glazed pool tile only) or a calcium scale pad rated for your pool surface – helps remove stubborn calcium deposits when used on compatible surfaces.
    • Pool-safe acid-based tile cleaner, or vinegar if the buildup is light – loosens and dissolves light calcium carbonate deposits, making scrubbing easier.
    • Gloves and eye protection – protect your skin and eyes when handling cleaning solutions.
    • Soft-bristle brush – scrubs away loosened buildup without scratching your pool tile.
    • Garden hose – rinses away calcium deposits after scrubbing.

    Note: Never skip gloves and goggles. The few minutes it takes to put them on is well worth protecting your skin and eyes from cleaning solutions, especially acid-based products.


    Step-by-Step DIY Cleaning Process

    The steps below will teach you everything you need to know from prep to post-cleaning care. Make sure to follow the steps religiously to avoid leaving buildup behind.

    Gather Your Supplies

    Prepare everything together before you start: your cleaning solution, brush, gloves, and hose. Stopping halfway through because you forgot something can cause delays.

    Test a Small Area First

    Find a spot that’s not obviously visible and try your cleaner there first. You want to make sure that it won’t discolor or mess up the tile before you clean the entire pool with it.

    Apply Cleaning Solution

    Put the solution directly on the deposits and let it sit based on the recommended time. It needs time to soak into the actual buildup to be effective, so work in small sections instead of applying the cleaner to the entire area at once.


    Scrub the Affected Areas

    Next is to use the pumice stone or a scale pad in controlled motions. Use steady pressure instead of doing aggressive scraping. Applying too much force can scratch or damage some pool surfaces.

    Rinse and Inspect

    Rinse thoroughly to remove any remaining cleaner and loosened calcium deposits. Older and more stubborn buildup may require multiple cleaning cycles before it is completely removed.

    Repeat as Needed

    If you can still see calcium deposits after the first pass, repeat the cleaning steps. Calcium silicate deposits tends to need more than one treatment.

    Post-Cleaning Maintenance

    Once the pool is clean, test your water and rebalance the pH, total alkalinity, and calcium hardness. If you skip this step, you’re only removing the visible buildup while leaving the conditions that caused it in the first place. Without correcting the water chemistry, calcium scale is likely to return.

    Professional Pool Tile Cleaning Services

    It’s best to call a professional if the buildup is past what a pumice stone and a weekend afternoon’s work can fix.

    When Should You Call a Professional?

    Here are a few signs that you need help from a pool cleaning professional:

    • You notice calcium scale that won’t budge no matter how many times you scrub
    • There’s significant buildup across a large portion of the pool
    • You notice rough surfaces, stained tile, or deteriorating grout around areas with heavy scale.
    • You don’t have the time or physical ability to do it yourself

    Waiting until your pool is already in poor condition gives scale more time to build up, making the eventual cleanup much more difficult than if you’d called sooner.

    How Do Pool Tile Cleaners Remove Calcium Scale?

    Professional pool tile cleaners use specialized methods to remove calcium scales that ordinary DIY techniques often can’t handle. One of the most effective is bead blasting, which uses tiny glass beads to gently break apart stubborn calcium deposits while minimizing the risk of damaging properly installed pool tile when performed correctly.

    Depending on the severity of the buildup, professionals may also use commercial-grade acid solutions that are stronger and more effective than products typically available to homeowners. Combined with the right equipment and experience, these methods remove calcium deposits more thoroughly while minimizing the risk of scratching, etching, or otherwise damaging your pool’s surfaces.

    What to Expect from a Pool Tile Cleaning Service

    Most pool tile cleaning service visits begin with an inspection of the buildup. The cleaning then begins and may take anywhere from a few hours to a whole day, depending on your pool size and the amount of scale.

    When choosing a service provider, look for a brand with actual experience in calcium removal, upfront pricing, and positive reviews from their customers.

    Preventing Future Calcium Buildup in Pools

    Removing the existing buildup is only half the job. Preventing it from returning takes consistent maintenance and properly balanced pool water.

    Pool Chemistry Maintenance

    Testing your pool water weekly during the busy season helps identify problems before scale has a chance to develop. Make sure that the calcium hardness, pH, and total alkalinity stay within the recommended ranges.

    Routine Cleaning and Maintenance Tips

    A few habits can go a long way, such as:

    • Brushing the tile and walls regularly, even before any buildup is visible
    • Keeping filters cleaned on schedule to help maintain proper water flow and filtration efficiency.
    • Correcting chemistry issues as soon as testing shows they’re out of balance instead of waiting for weeks

    Being diligent and consistent with these maintenance tasks can significantly reduce the likelihood of calcium scale forming.

    Water Source Considerations

    When you are using naturally hard water to top off your pool, you’re adding more dissolved calcium with every refill. In areas with hard water, periodically testing your fill water and monitoring your pool’s calcium hardness can help you determine when corrective action, such as partial water replacement or other water treatment options, may be needed.

    Frequently Asked Questions

    1) Can I use household cleaners on pool tiles?

    No. Most household cleaners are not designed for pool surfaces and may contain ingredients that can damage certain finishes or affect pool water chemistry. They also may not be effective at removing calcium scale. Always use a cleaner specifically formulated for pool tile.

    2) Can calcium buildup return after removal?

    Yes. It can return if the water chemistry remains out of balance, so maintaining proper pH, total alkalinity, and calcium hardness is the best way to help prevent future scale buildup.

    3) How often should I have my pool professionally cleaned?

    It depends on your water chemistry, local conditions, and how frequently your pool is used. Pools in areas with hard water, including many parts of Texas, may require professional tile cleaning more often than pools in regions with softer water. If you notice stubborn calcium deposits that don’t respond to routine maintenance, it’s a good time to schedule a professional cleaning.

    Stay Ahead of Calcium Buildup

    Calcium buildup usually starts as one faint line near the waterline, which is easy to ignore. However, it won’t stay that way if the water chemistry is in the right range and if you do regular brushing. Spot calcium buildup as early as you can and remove it the right way, so you can also save a much bigger bill later.

    If your tile already has signs of heavy scale or your DIY isn’t working as well as it should, don’t hesitate to call the Poolie team. Fill out the form below and get your pool’s surfaces looking right again.